Fast & Furious 6 Case Study
Case Study
Image Engine Takes Vehicular Warfare to a Whole New Level In the sixth installment of the wildly popular Fast and Furious franchise.
In Fast and Furious 6, the action has become even speedier, tougher and a whole lot more explosive. VFX Producer Kevin Elam, Producer Neal Moritz and forth-time franchise Director Justin Lin approached Image Engine to turn up the dial on one of the film’s most action-packed sequences.
“When we got the call from Universal, we were ready to jump on board straight away” says Visual Effects Executive Producer Steve Garrad. “We’d worked with Kevin Elam on Battleship previously, and had a great experience. We re-assembled many of the crew that recently worked on Battleship and Zero Dark Thirty including Visual Effects Supervisor Chris Harvey, so we knew we had the right team for the job.”
In Fast & Furious 6, the adventure travels to London, England, where an all-star cast (including Vin Diesel, Paul Walker, Dwayne Johnson and Michelle Rodriguez) takes on an organization of mercenary drivers. The team of elite drivers weaves a path of destruction across Europe as they battle it out at street level.
To augment the action, Image Engine brought about immense digital destruction, created complex computer-generated structures and generated an endless array of massive dust simulations and digital explosions. Added to that were hundreds of CG vehicles, digital doubles, face replacements, rig removals, set extensions and green screens.
“This wasn’t a show about subtlety,” says Chris Harvey. “We were always asking for ‘more’ … more dust, more destruction, more violent impact -without fail it was about taking things over the top to make it more fast and more furious!”
Developing the Digital Demolition
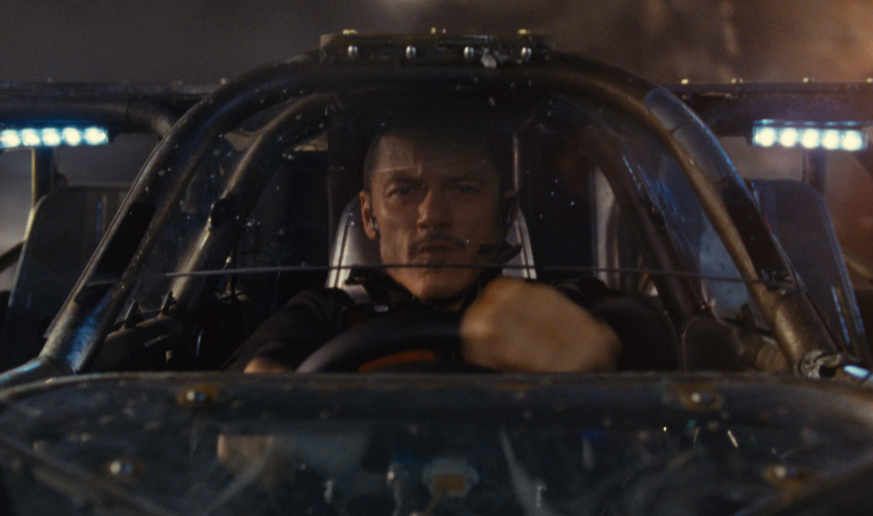
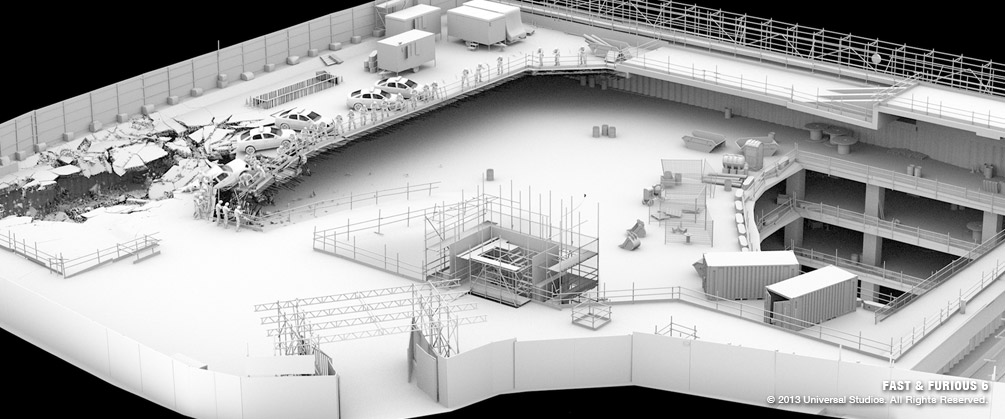
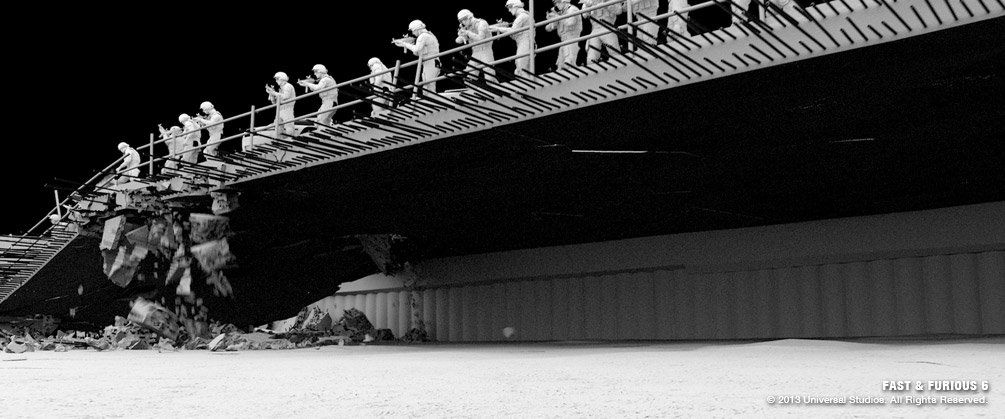
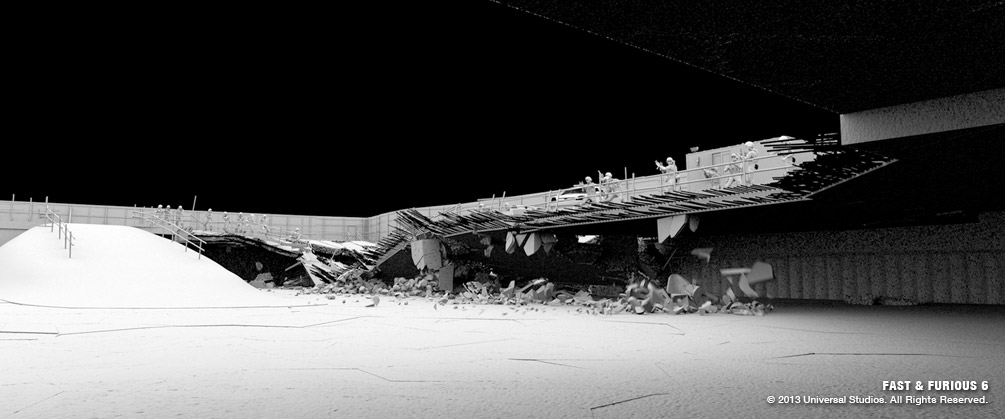
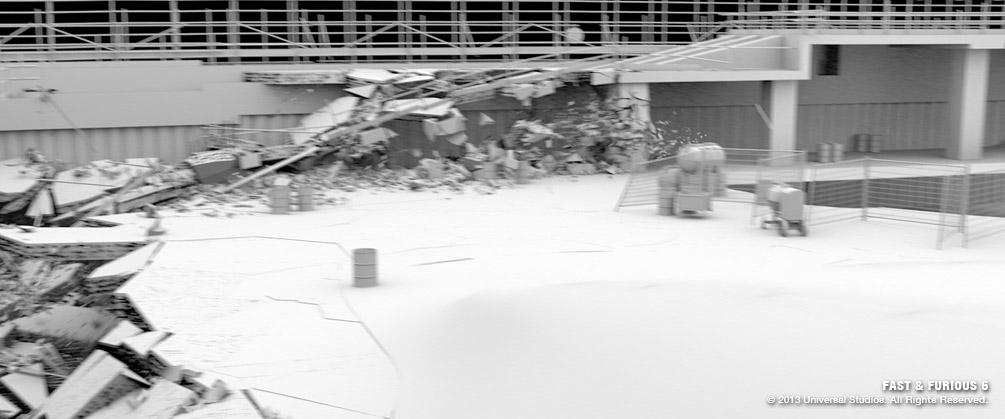
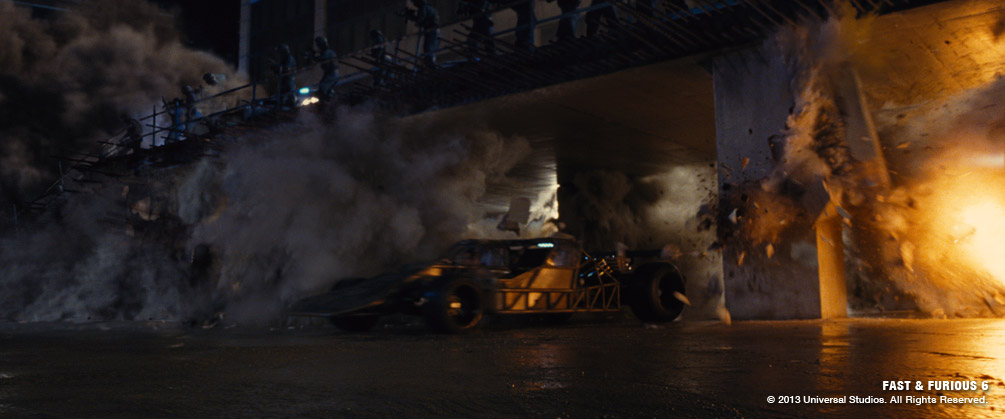
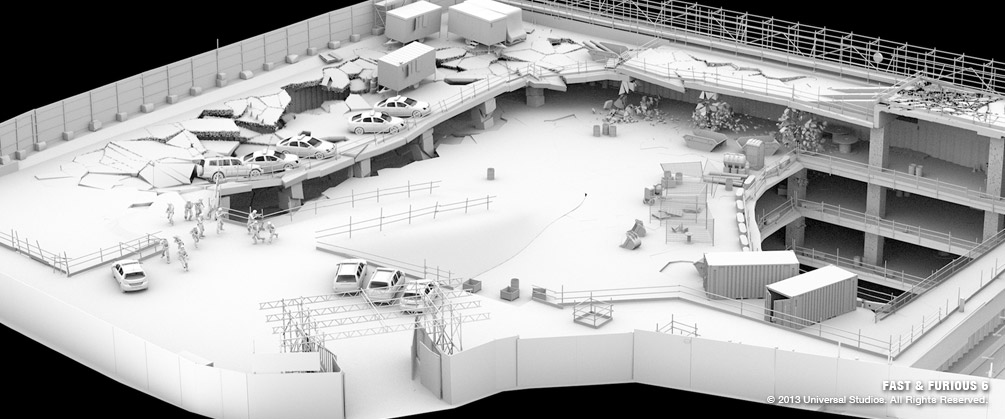
Image Engine’s work on Fast & Furious 6 began with CG Supervisor Koen Vroeijenstijn visiting the set in London for one of the main visual effects sequences, the ‘Shaw Trap Raid’, to gather all the information they would need later to recreate it digitally.
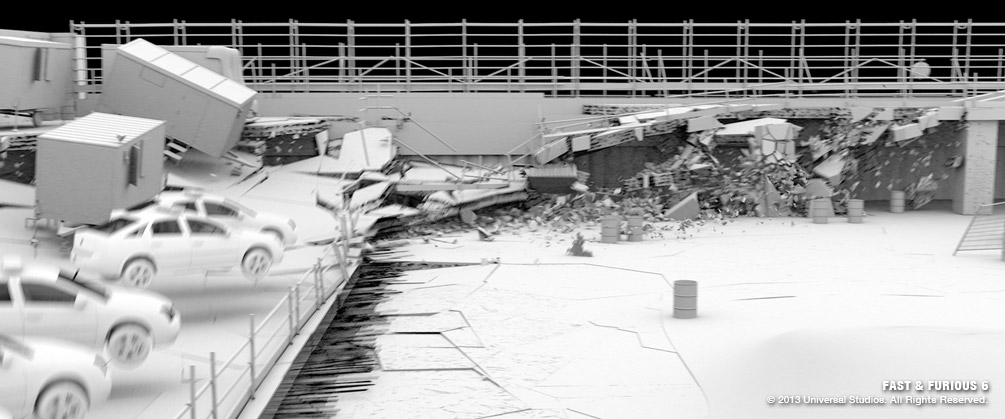
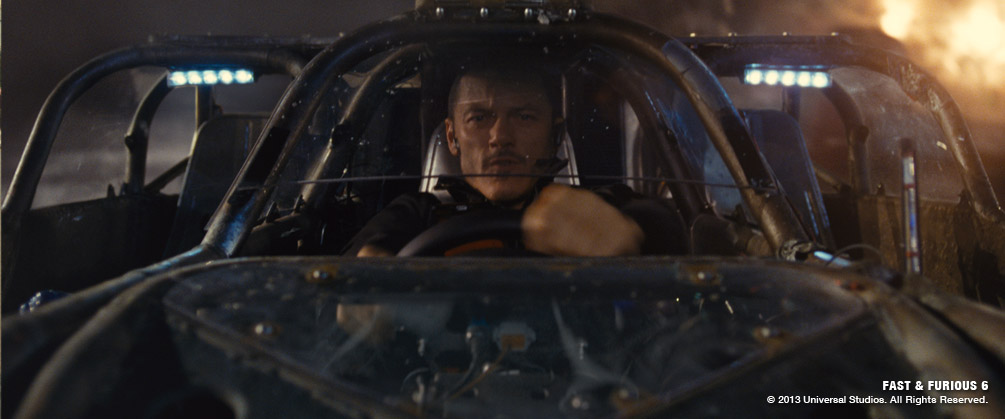
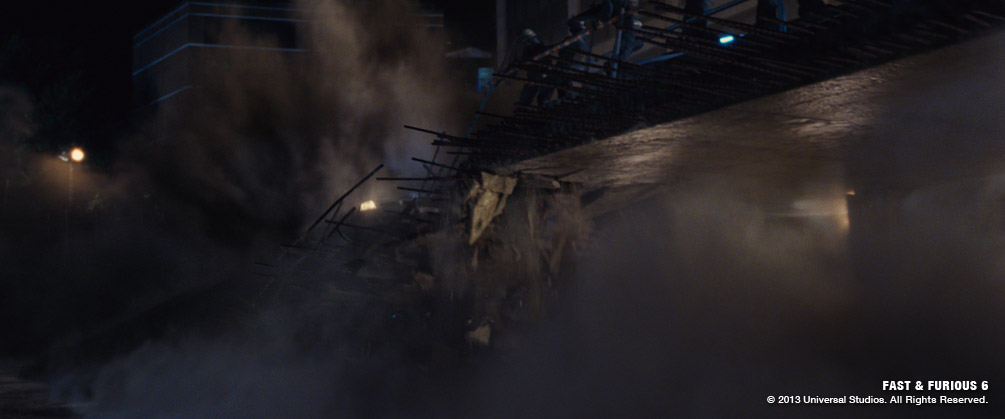
In the sequence an entire parkade was destroyed while badass character Shaw (played by Luke Evans) raced out to escape the police raid. “From the beginning it was clear that the raid sequence would be the biggest challenge for 3D,” recalls Koen. “After getting back to the studio, there was a lot of work to be done figuring out the tools and pipeline the 3D departments would need to deliver this show.”

Recent developments to the FX pipeline driven by Zero Dark Thirty, Elysium and R.I.P.D. provided the backbone for the workflow development, but the massive scale of this destruction sequence posed a whole new set of challenges. “When Sam Hancock came on to the project as FX Lead, we spent some considerable time developing new tools and workflows to make sure we could destroy a full sized building with enough detail and directability,” explains Koen. “The effects department at Image Engine mostly uses SideFX’ Houdini these days. Using Houdini allowed Sam to prototype, test and finalize many of the required tools without having to write a lot of code. The fantastic version management for tools inside Houdini that Andrew Kaufman developed for use in Elysium and R.I.P.D. allowed FX to start using these tools while Sam was still refining and improving them – upgrading to new versions was simple and painless.”
An additional challenge came in the form of shifting timelines, when two of the largest shots in the sequence were nominated for the trailer that would premiere during the 2013 Superbowl, which meant the crew had to finalize the new destruction pipeline two months earlier than originally planned.
“The great thing about this early push, strenuous as it was, is that it gave us a chance to run our destruction pipeline prototype through start to finish on a shot,” recalls Chris Harvey. “And that’s how we managed it – it wasn’t about making the perfect system yet but rather focusing on exactly what was needed for the trailer and using it as a foundation for running the destruction pipeline through its paces.”
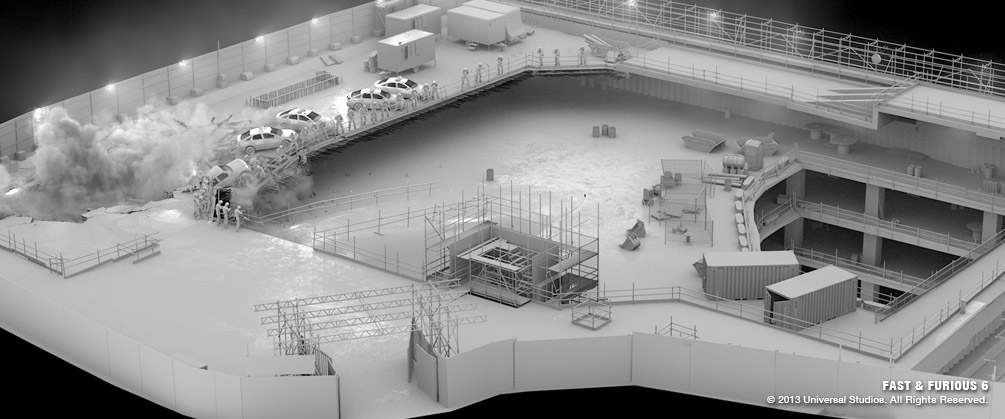
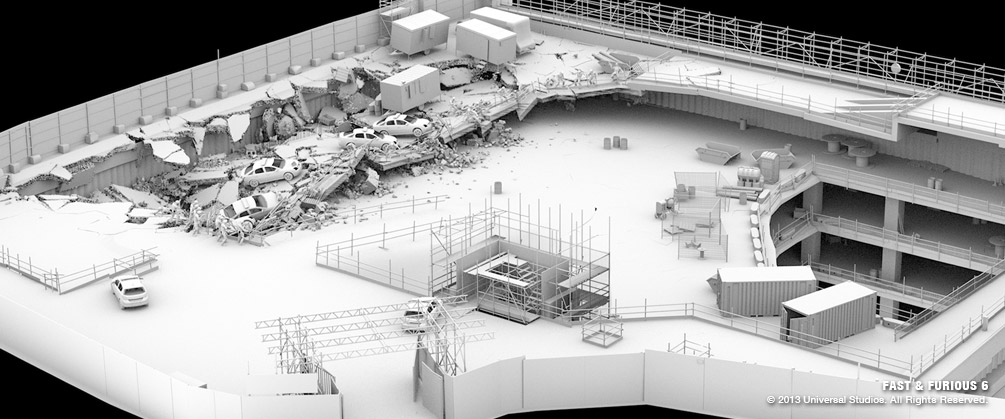
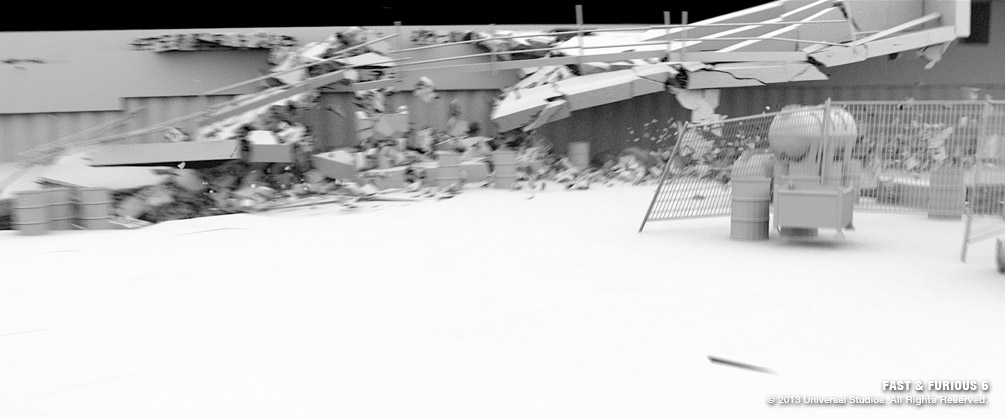
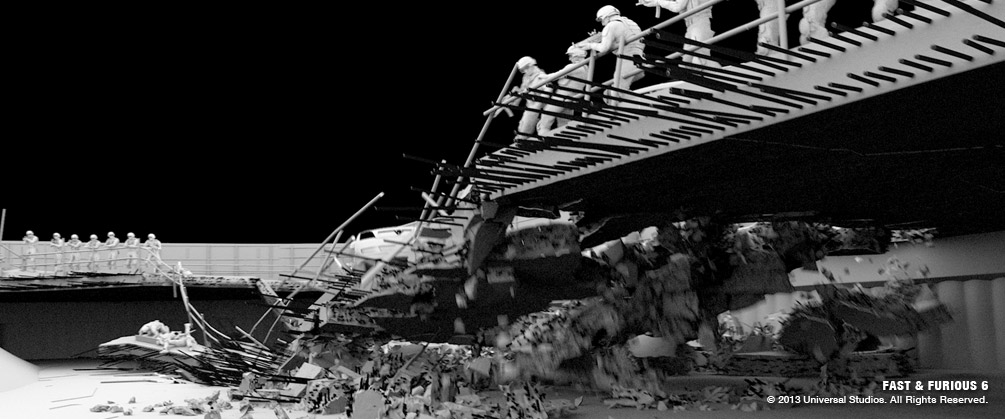
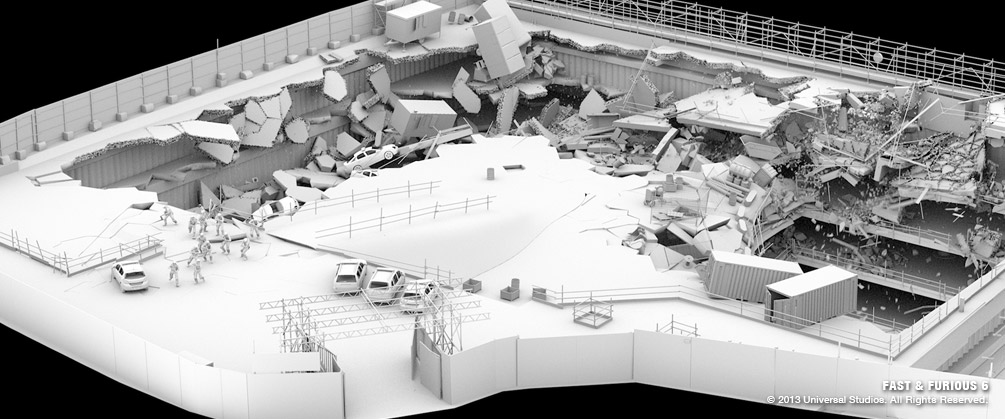
Mathias Lautour was joined by Lighting Lead Caine Dickinson to develop the look and setup in the trailer shots. “The main challenges here were the huge amounts of geometry that would need to be rendered, and the tight integration with FX,” explains Koen. “We used 3Delight, but instead of the usual pre-processing and caching of shadow maps and indirect lighting point clouds, we switched to using full ray trace mode. Since this was still under heavy development we ran into several issues. Daniel Dresser from the Image Engine R&D department was crucial in ironing out some of these bugs so we could actually deliver huge shots using this technique.” In the end, the workflow for some of the bigger destruction shots, involved almost every department at Image Engine. Koen describes the process: “Assets had originally just built the parts of the location that we would see collapsing, but the further the shots progressed, the more we realized almost all of the set would need to be replaced with a digital copy. So they added all the objects one would find on a construction site (the parkade was still under construction). The building went over to FX where the floors, columns and walls were broken up into interesting sections. Our Supervisor Chris was always pushing us for a sense of structural integrity in the simulations so we even built and simulated substructure elements within the parkade. The whole collapse had been choreographed with an even rougher mode. This phase replicated and refined the motion of this postviz.”
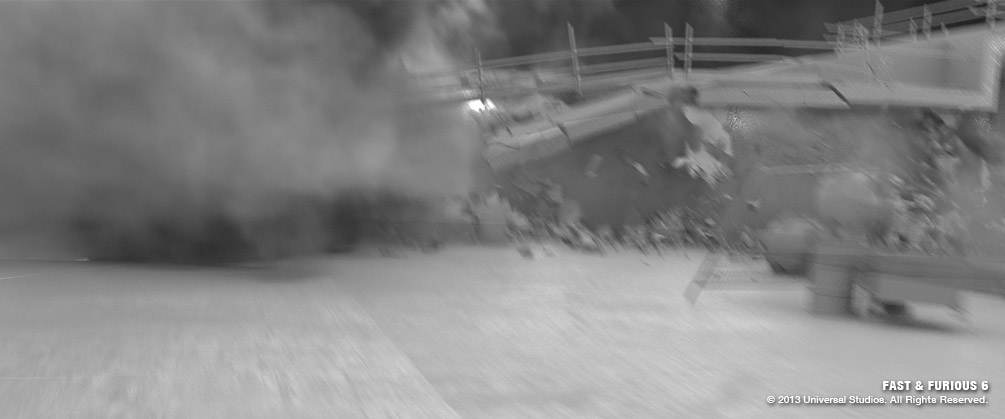
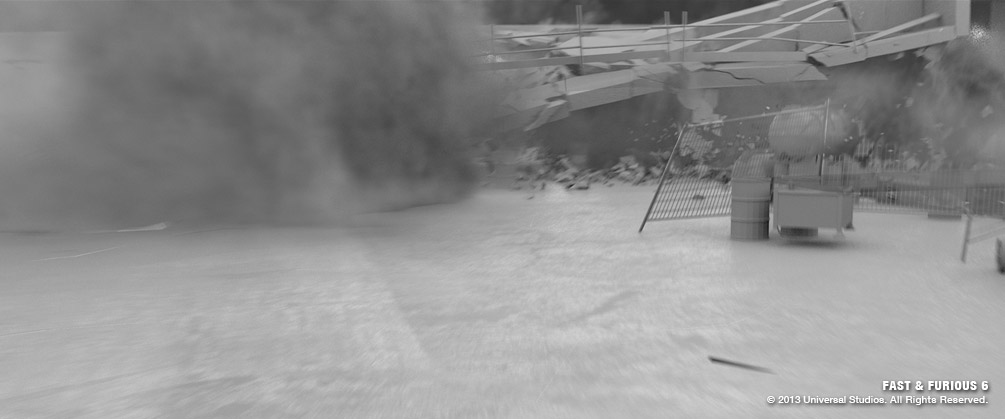
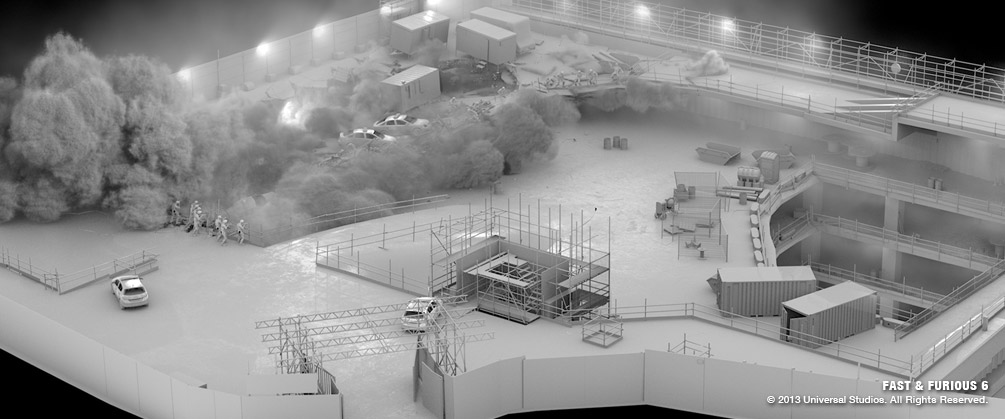
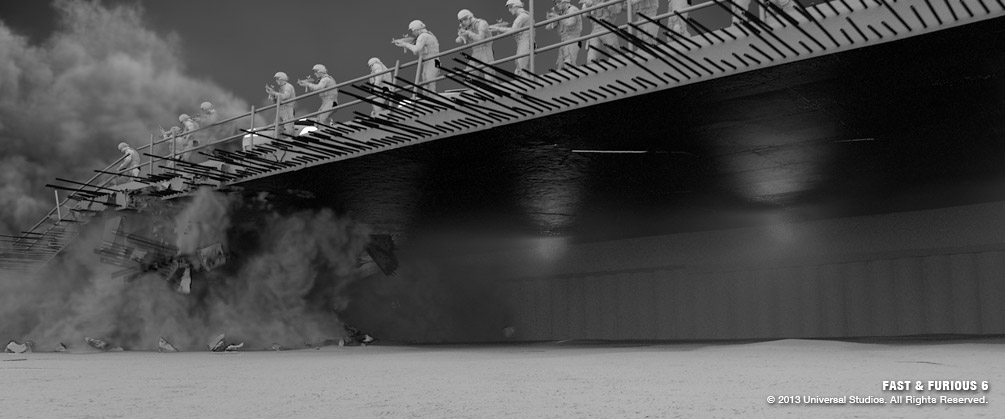
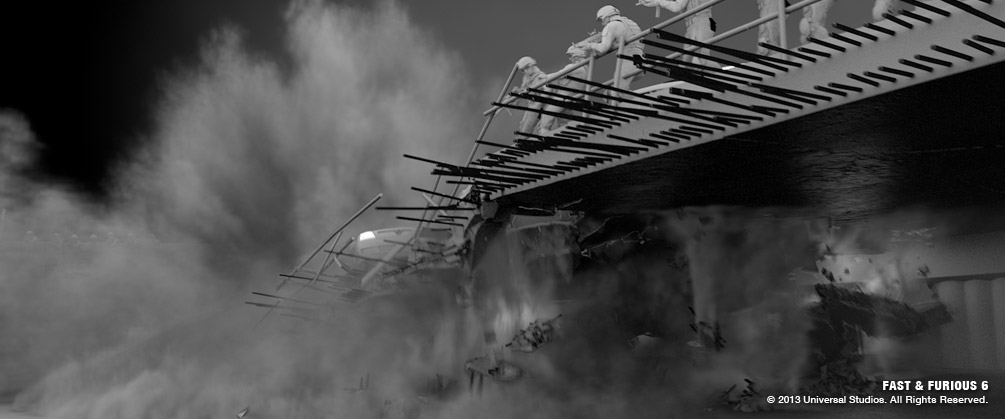
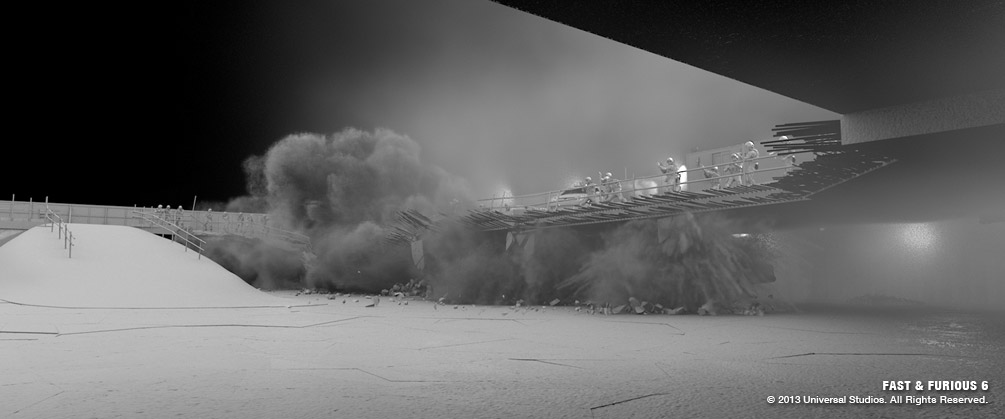
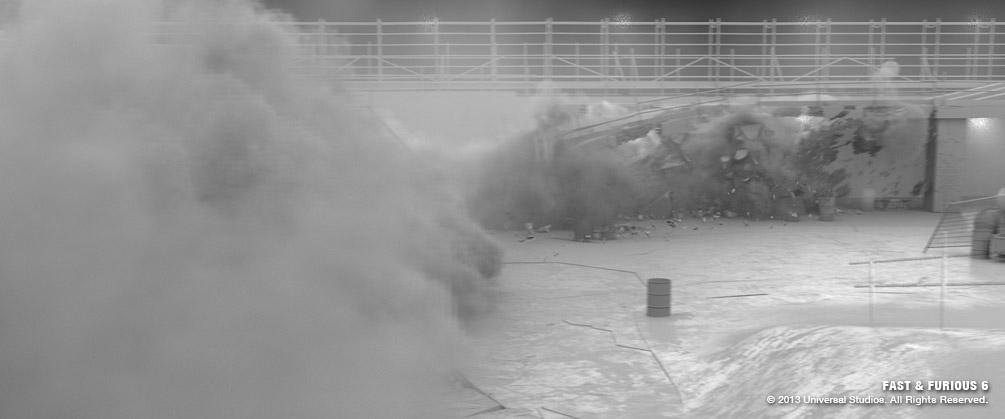
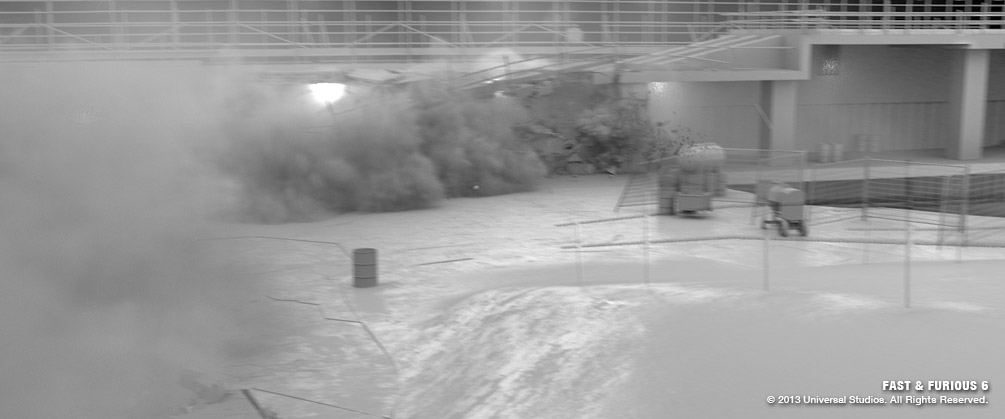
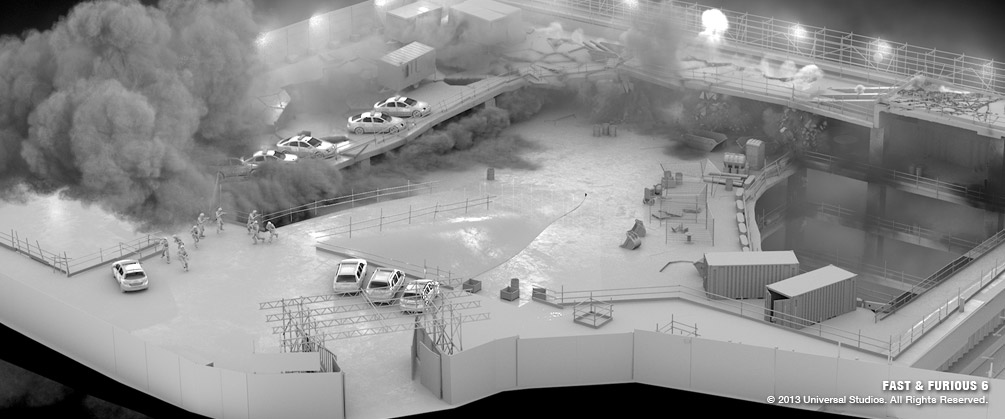
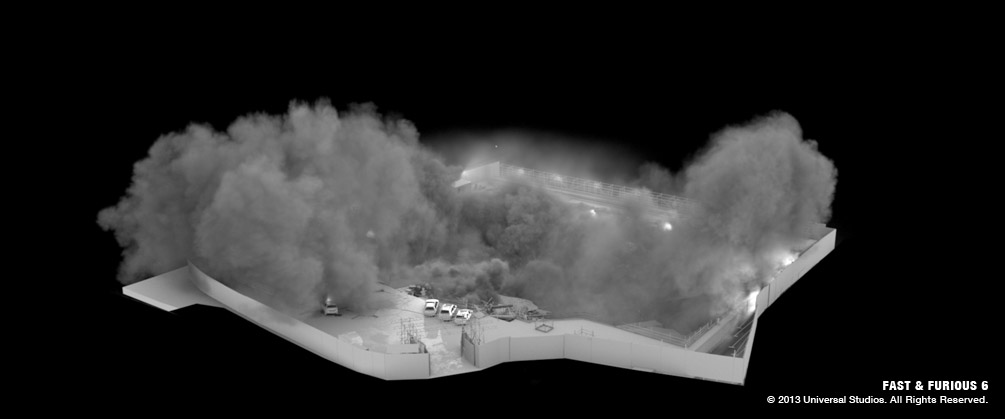
“Once this initial fracturing was complete, the first pass went to lighting, where Caine and his team could start setting up the shots,” continues Koen. In the meantime, Sam and the other FX artists added a detailed fracturing pass, breaking up the edges and smashing some of the larger pieces into more interesting shapes. Based on this pass, they ran a fluid simulation that encompassed the entire set. While the motion of this simulation often looked great, and tied in very well with the motion of the destruction, the size of the set made it hard to get enough detail in the dust simulations. To solve this, FX ran smaller high resolution, more contained simulations where the emission of dust was driven by the destruction and the motion was inherited from the rough large simulations. This gave us the best of both worlds, the motion fit very well with the action in the shot, while we could add detail where necessary.” The lighting and rendering of the dust was also handled in FX, inheriting the lighting setup from the rest of the set. FX provided the compositing team with multiple passes that granted them tighter control to integrate the dust seamlessly into the CG scene. This included volume environmental lights, police lights and the car’s headlights, ID passes and dust particles to make the simulation more dynamic.
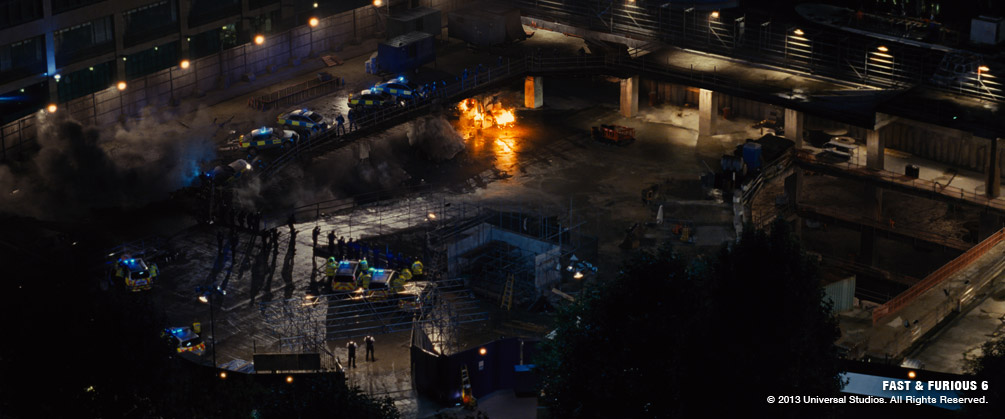
At the same time, FX and lighting were also working together with the compositors in the close up shots for the sequence, creating powerful explosions that required a lot of attention in terms of timing and continuity. “Those shots were a little easier to tackle since we could use the real explosions in the plate as reference for lighting and density and blend them with CG generated ones,” says Jesus. “Additionally, they had to remove a huge crane that stood in the middle of the plates, which held the lighting for the whole set – having to replicate whatever explosions and collisions that happened behind the crane.” The sequence required the work of five compositors for the whole length of the project. Compositor Pau Rocher was in charge of the look of the main open shots, working alongside Maya Roza to complete the half dozen shots that define the scene.
“Often with this kind of work you will focus on one or two benchmark shots and take them all the way to final and then start knocking the rest off one at a time,” explains Chris. “However in this case it was very important to me that we didn’t do that but instead took all the shots up together progressing them equally towards final. The action was cut so quickly and the edit was in constant flux, so making sure we had a continuous flow of events gave the production as much flexibility as possible. In order to do this we ran through many various stages of blocking and detail in the simulations taking each one all the way through comp and into editing. Doing this allowed everyone to see the overall progression of the entire sequence and kept us all on track throughout the process.
Flashback to Tokyo Drift
One of the digital sets that Image Engine built for the film was a busy street in Tokyo, which harked back to the third movie in the franchise: Toyko Drift. This was solved as a combination of 3D, matte painting and a lot of compositing.
For the compositing team, the Tokyo Drift flashback sequence stands out as the most challenging sequence of all, as Jesus explains: “Since we were in charge of the look development of the sequence, we had to create an environment almost from scratch that would work with elements from the third movie of the series. We used that original sequence as reference but we had very little raw material to play with.”


For this, Compositor Keegen Douglas recreated one of the busiest commercial neighborhoods in Tokyo with the characteristic advertising screens, colourful signs and endless glittering lights, with the help of a matte painting painstakingly created by Michael Steward. The matte painting was projected over building geometries supplied by 3D, along with the addition of several computer-generated cars. Image Engine also directed a green screen shoot in Vancouver for additional crowd elements to be used across the sequence. “The Tokyo shots also needed quite a bit of love in the treatment of the foreground plate since they were shot with fairly neutral illumination,” Jesus adds. “That certainly helped when we were keying the green screens but didn’t really work very well when trying to make those plates look like they were really part of the environment. Colour correcting the plates and adding a bunch of smoke and other elements was necessary to bring everything together.”
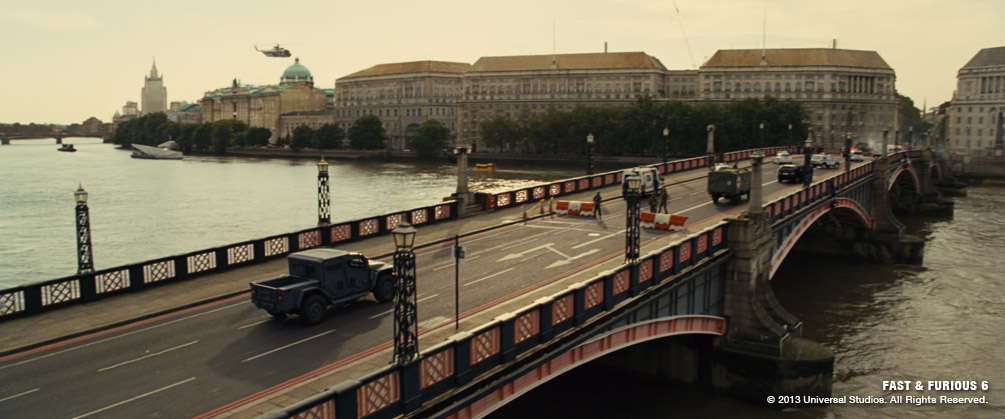
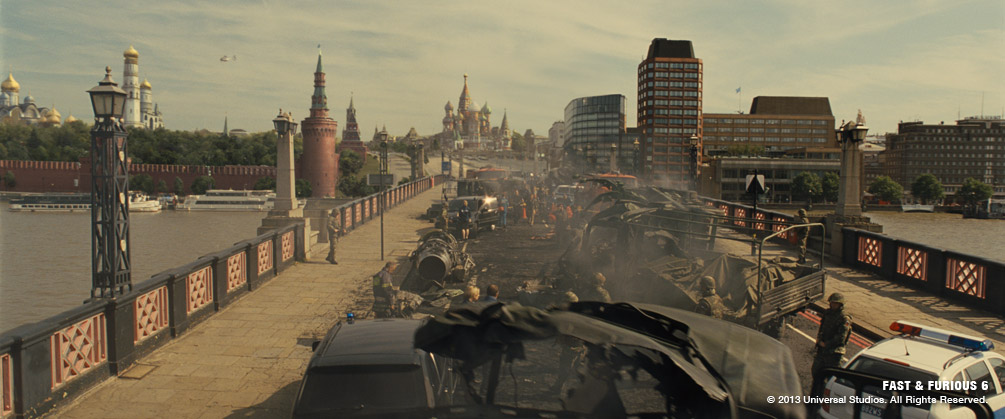
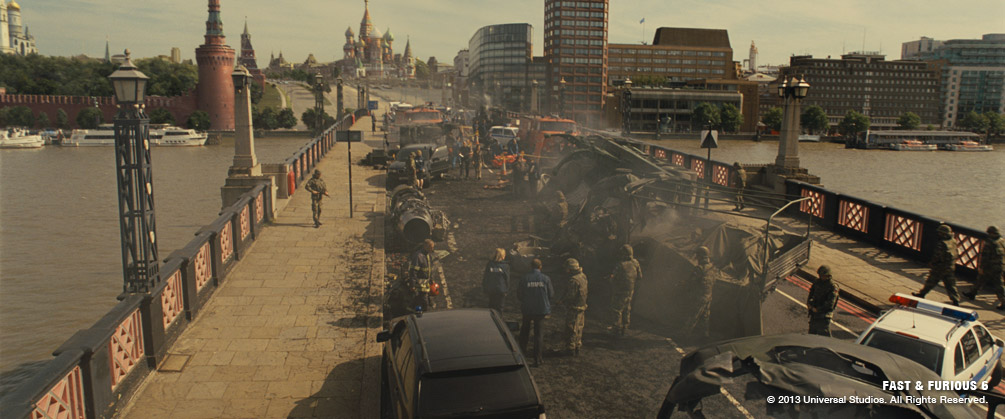
London’s Moscow Makeover
Much of the filming took place in the UK, and London provided the city background for the scenes set in the City of Moscow. For visual effects, this meant replacing a lot of the detail, transplanting landmarks from one city onto the other. “Matte Painter Kent Matheson created a large matte painting of the Kremlin and surroundings that we integrated into a vastly different environment shot over the Tower of London,” Jesus recalls. “Compositors Jesus Yapor and Tim Jones replaced the old London buildings in the plate with other key landmarks including Saint Basil’s Cathedral and Ivan The Great Bell Tower.”
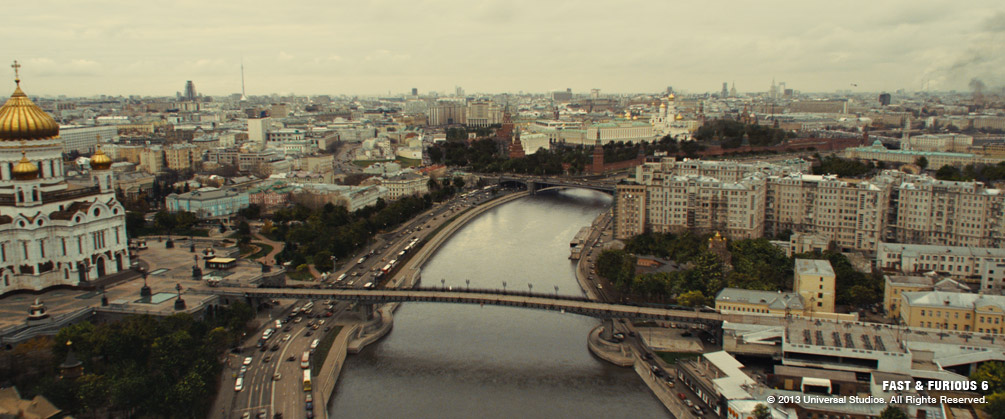
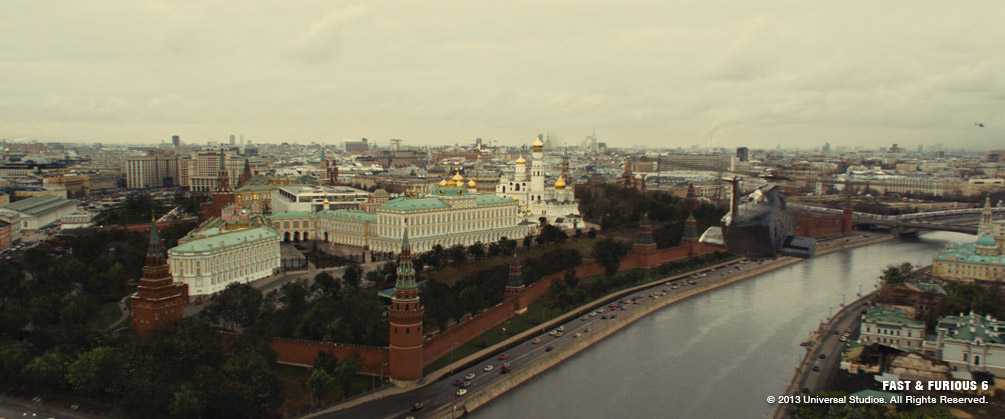
The establishing shot for the scene was an aerial view flying over the city of Moscow.
This seemingly straightforward camera move became one of the most complex tasks for compositing as the shot had to be heavily digitally manipulated to achieve a dynamic shot. The original aerial footage was filmed by the production, which sent a crew to Moscow, where they encountered some restrictive no-fly zones. Unable to fly their helicopter over the Kremlin, they filmed using a Red camera attached to a miniature helicopter. When the plates came in it was clear that the helicopter had been unable to fly fast enough to create a dynamic shot, so Image Engine was tasked with creating the desired effect by re-timing and stabilizing the raw footage.
Jesus explains: “We had to retime 2000 frames down to something like 7 seconds, which works out to be approximately 15 times faster. This caused a jittery camera motion that was impossible to track and didn’t look very realistic. So we had to go back to the original plate, track it before retiming it, smooth the camera motion as much as possible, run the retime and make sure that smoothing the camera was not creating weird artifacts related with the camera-jitter motion blur.”

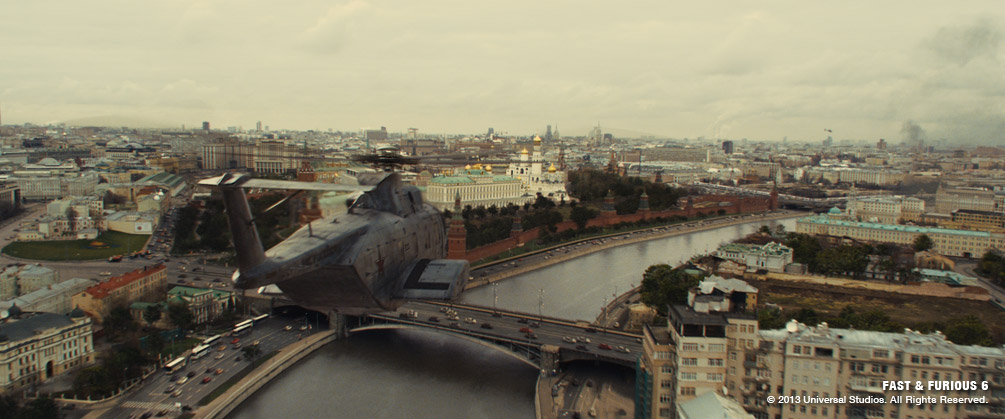
Once the team was satisfied with the camera motion the real work began, which involved dissecting the shot to replace every element that was affected by the retime. “When you speed up a shot to this extent things like cars, walking people, water on the river and any other moving objects appear completely unbelievable,” says Jesus. “Since this was shot in a busy day in Moscow, we had a plate that had crowds of people walking in the streets and hundreds of cars running at a very unusual speed and so on.” The painstaking process of removing all the elements began, painting out the cars, emptying the roads and the streets and replacing them with elements going at the proper speed.
“Besides that, we also had to change the season within the shot,” he adds. “The plate was filmed on a dark fall day, and it was supposed to be springtime. Matte Painter Romain Bayle and compositor Tim Jones worked together to achieve the makeover of Moscow City including the huge colour correction and filling hundreds of bare trees with lush greenery. After that, Koen and Caine provided all of the digital cars to fill the roads and to make the shot more dynamic, added a huge digital army helicopter flying into frame.”
Image Engine was also responsible for a whole variety of other miscellaneous work. It included everything from augmenting a fight in an interrogation room (including re-times, digital debris and ceiling extensions), digital prison extensions, environment extensions in various locations when re-introducing Vin Diesel and his crew – and even creating a police car that had been embedded into the exterior wall of a building 3 floors up!


“The Image Engine crew accomplished some complex visual effects work in a very condensed time scale,” recalls Visual Effects Producer Geoff Anderson. “The Supervisors and lead crew including Chris Harvey, Koen Vroeijenstijn, Sam Hancock, Jesus Lavin and Caine Dickinson all did an amazing job of pulling all the departments together to work against the clock.”
“The success of the project really depended on seamless communication between the crew,” adds Chris Harvey. “We also relied heavily on our fantastic R&D department, who have been working tirelessly to improve our tools and workflow to help us work smarter and faster. At the end of the day, everyone involved achieved stunning results that we can all be proud of.”