R.I.P.D. Case Study
Case Study
Bringing the Deados to life: Image Engine creates key creatures for Universal Pictures’ supernatural action adventure movie, R.I.P.D.
In the summer of 2011, shortly after work wrapped on Universal Pictures’ The Thing, Universal approached Image Engine about another creature show – this time a supernatural action adventure film, based on a comic book from Dark Horse Comics, called R.I.P.D.
The film tells the story of a team of undead police officers (Ryan Reynolds, Jeff Bridges) working for the Rest in Peace Department, protecting the living by hunting down souls who refuse to pass to the other side, AKA ‘deados’. Image Engine was tasked with creating two key computer generated deado characters for the film, Pulaski and Nawicki.
“Given the work that we had just completed on mutating creatures for The Thing, R.I.P.D. was a logical next step,” said Visual Effects Executive Producer Steve Garrad. “Image Engine had already successfully proven its ability to handle creative creatures but the scope of the work on R.I.P.D. was even more complex. It was an exciting challenge for the company, and a real pleasure to work with Director Robert Schwentke and the production visual effects team, VFX producer Juliette Yager and VFX supervisor, Mike Wassel.”
“It was great to be able to pick up from where we left off on a previous show and try to do it even better,” added Visual Effects Supervisor for Image Engine, Jesper Kjölsrud. “We like to take on a challenge and step up the game with every show we do – and it wasn’t just the creature work on this show. The amount of shots and the complexity of those shots, which all incorporated CG environments, creatures and FX, was extremely demanding. The creatures of R.I.P.D. were far more interactive than anything we’d done before – and crucially, they were also talking characters. The realism of our work was taken to the next level with this project.”
The shoot began in the fall of 2011 and the project wrapped in May of 2013, with over 500 shots having been completed, 300 of which were creature shots.
The Crew
“We assembled a fantastic crew”, recalled Visual Effects Producer Vera Zivny. “VFX Supervisor Jesper Kjölsrud and Animation Supervisor Lyndon Barrois reteamed from their work on The Thing to lead the project, with Martyn Culpitt as compositing supervisor, Rhys Claringbull and Ben Toogood as sequence supervisors – and of course a great lineup of artists.”
“We split the project in half to begin with, with our two main characters being driven by two different teams, which worked really well,” said Kjölsrud. “Some departments like Rigging and Creature FX, supervised by Fred Chapman, worked across both teams.” The Pulaski Animation Lead was Jeremy Stewart, and Christian Liliedahl led the Nawicki animation.
Creating the Deados
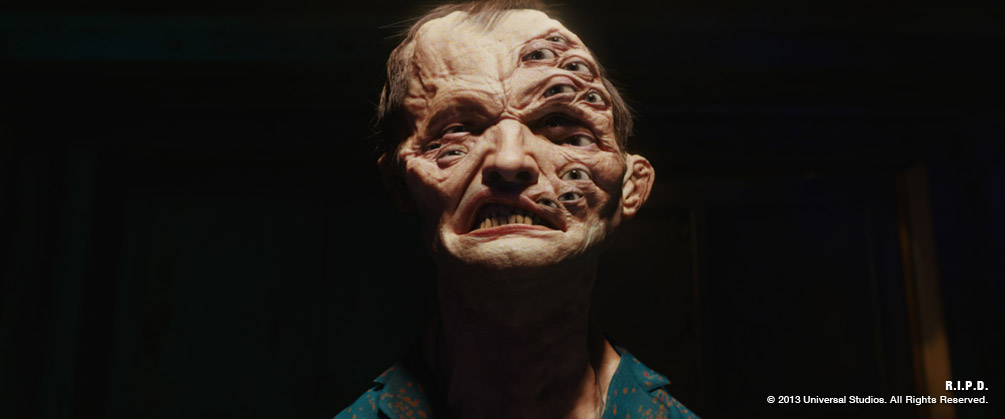
Image Engine received some creature designs early in preproduction, before the actors were cast. “Our biggest design addition was to make them look more like the actors, while remaining true to the original concept,” noted Kjölsrud. “We added the subtleties that we wanted to keep so that you could recognize them even though they were vastly different from their human selves.”
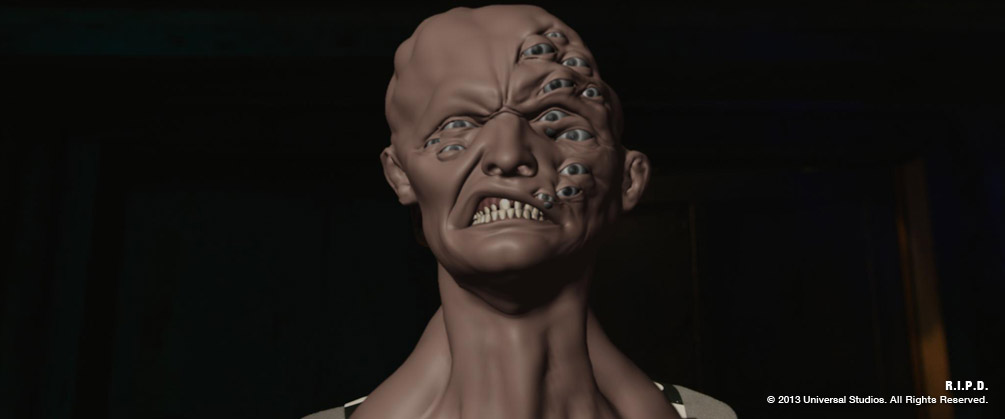
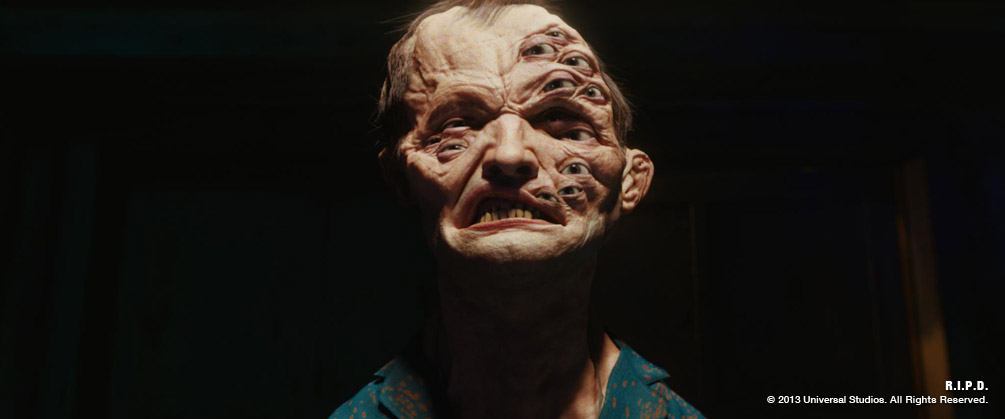
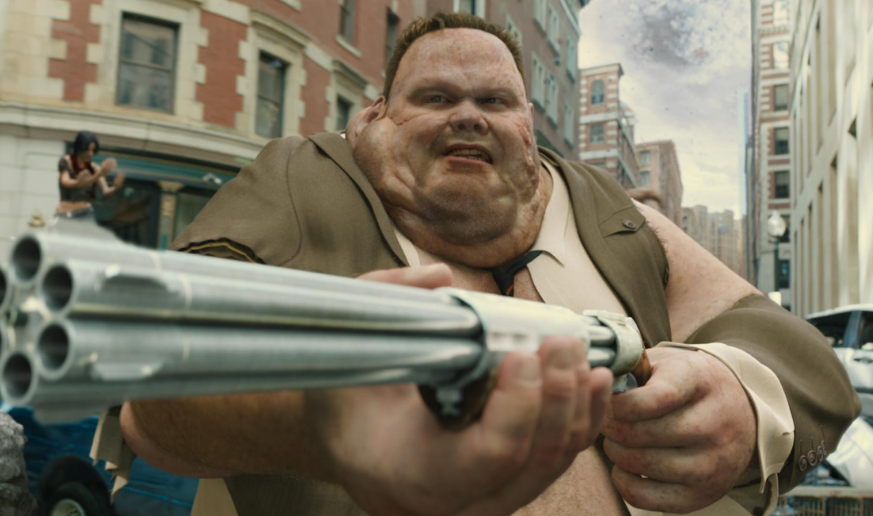
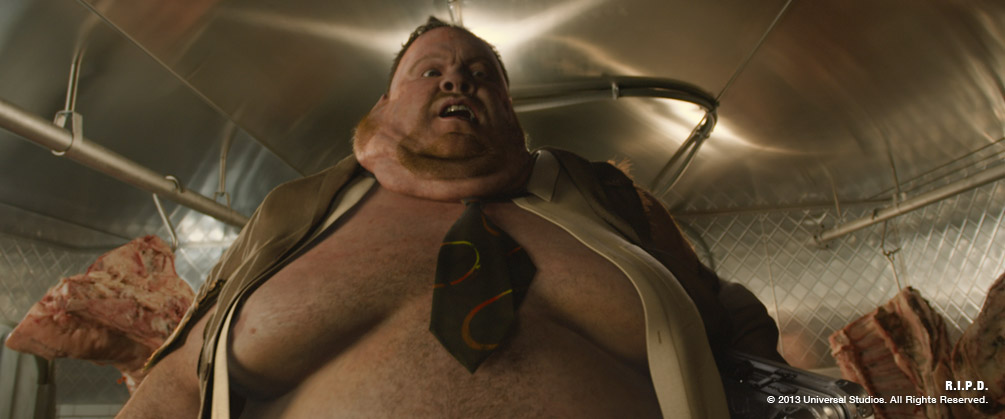
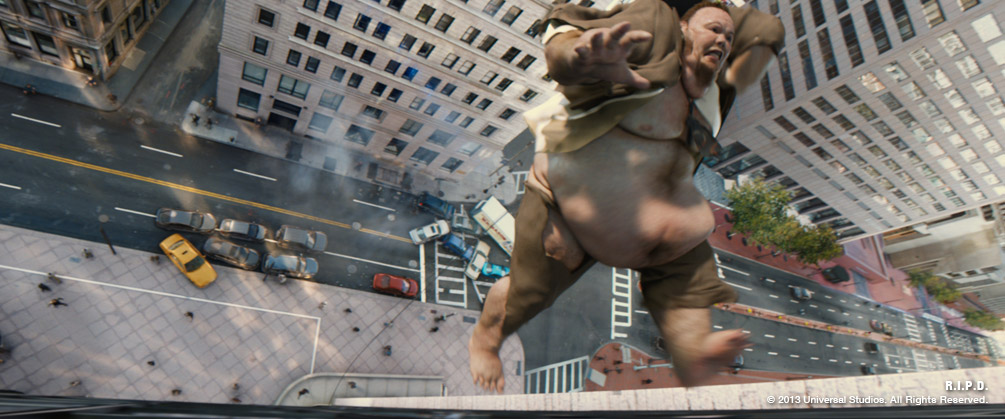
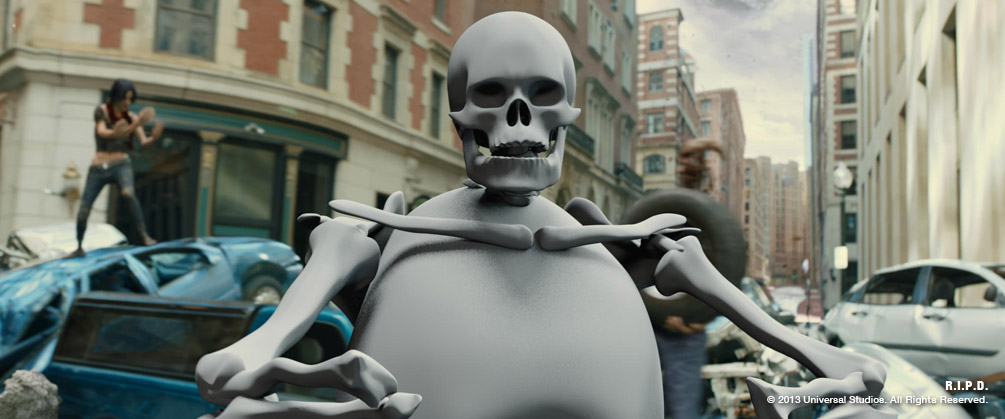
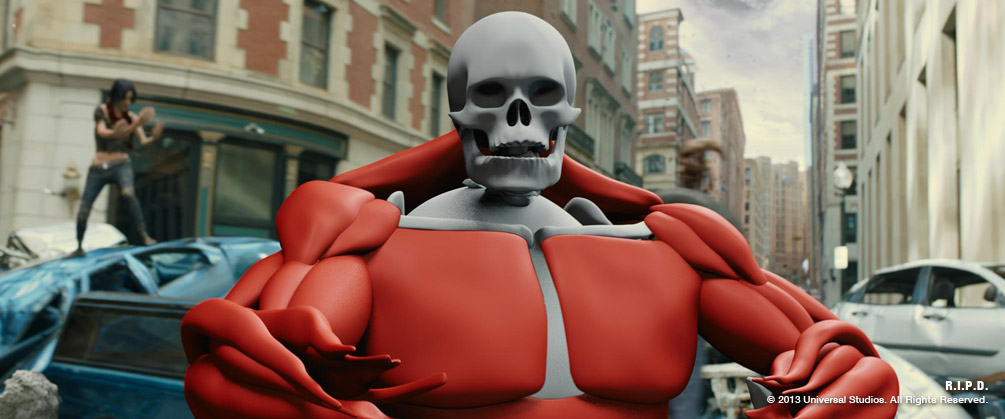
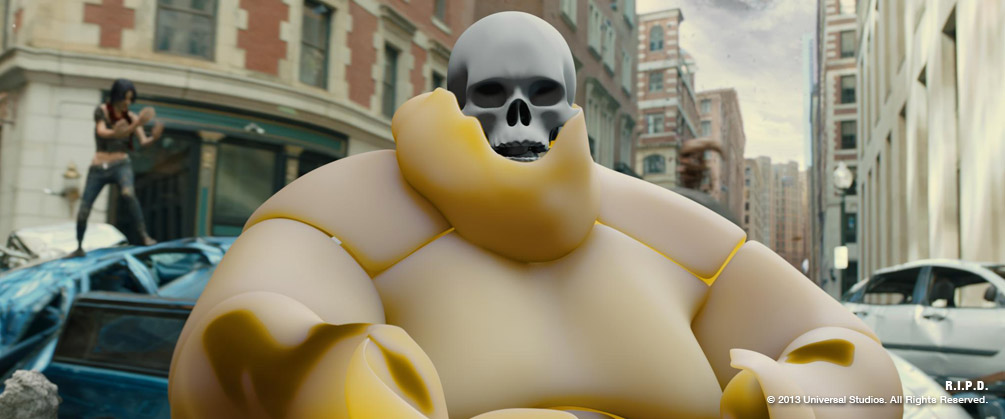
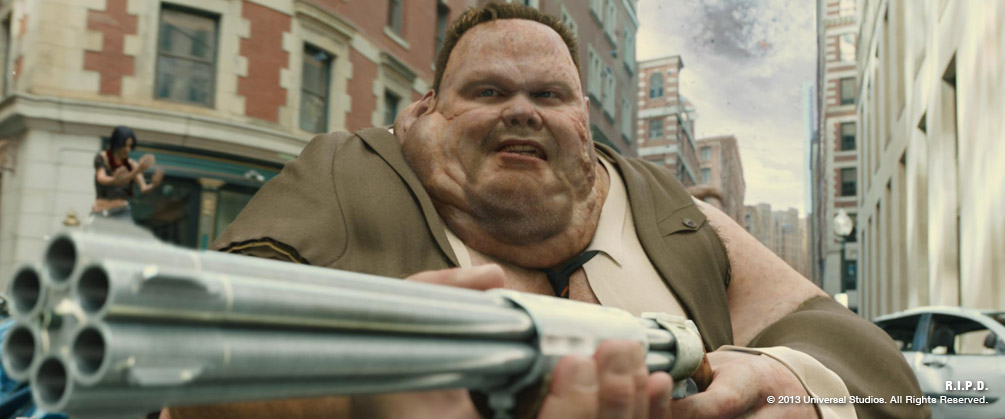
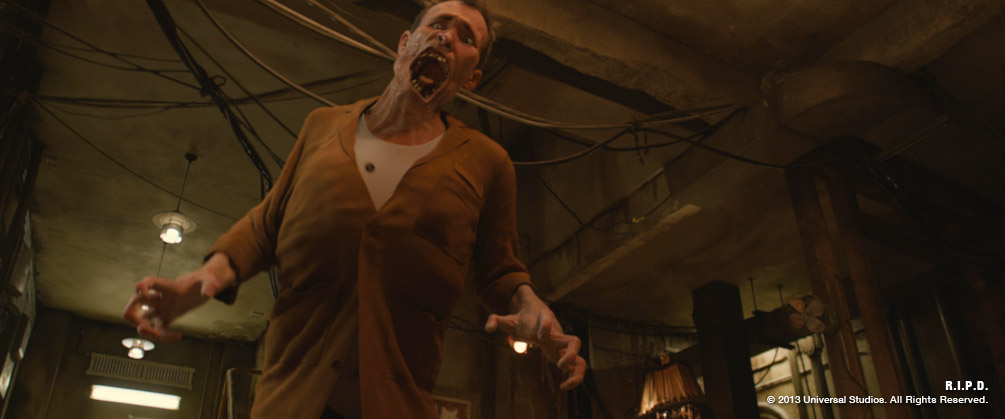
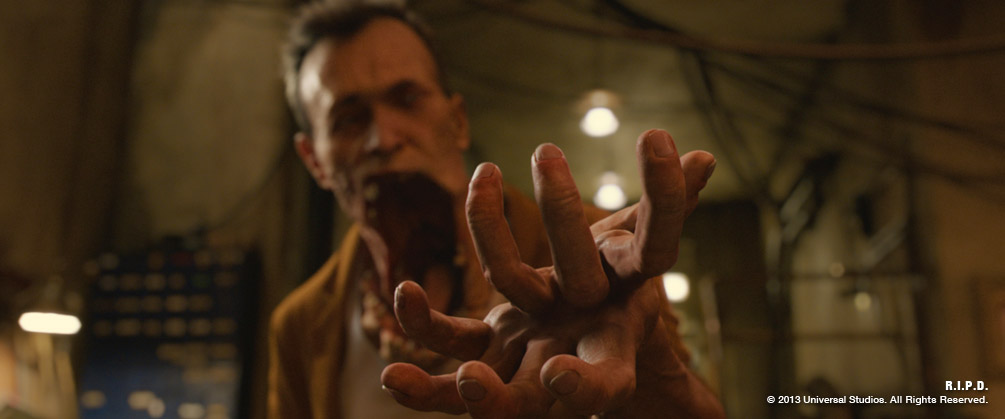
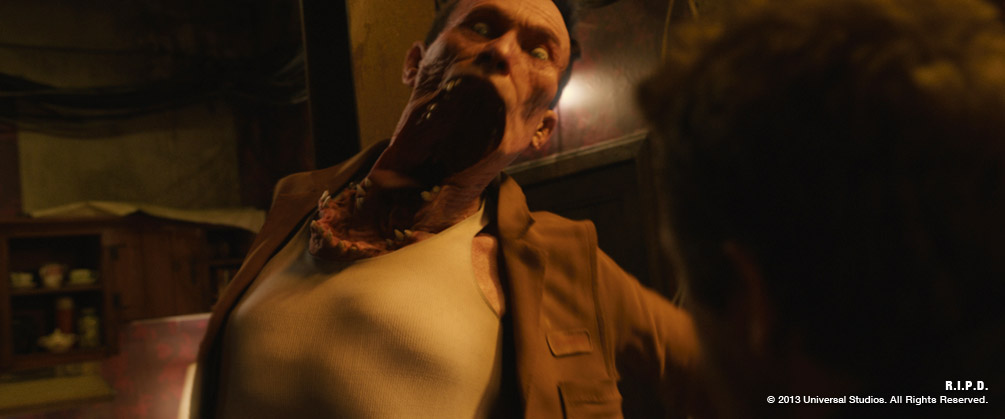
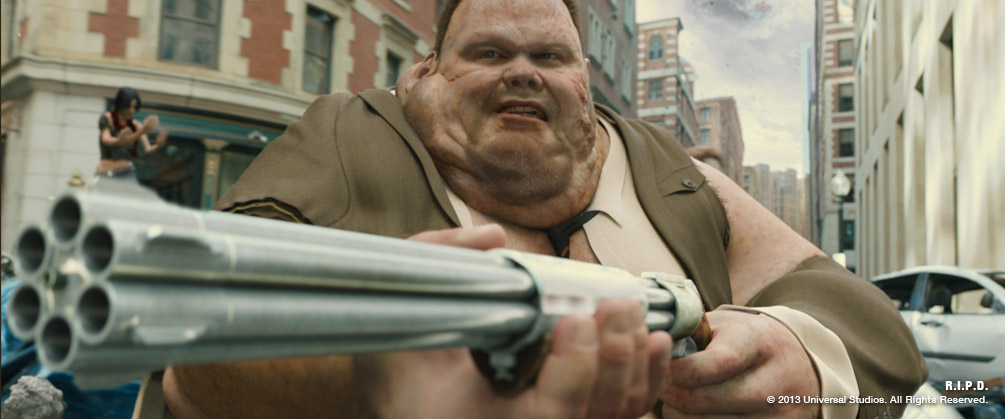
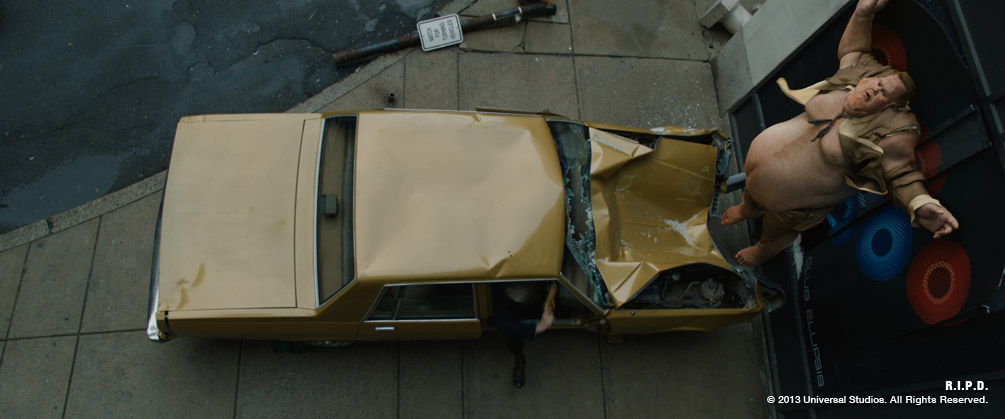
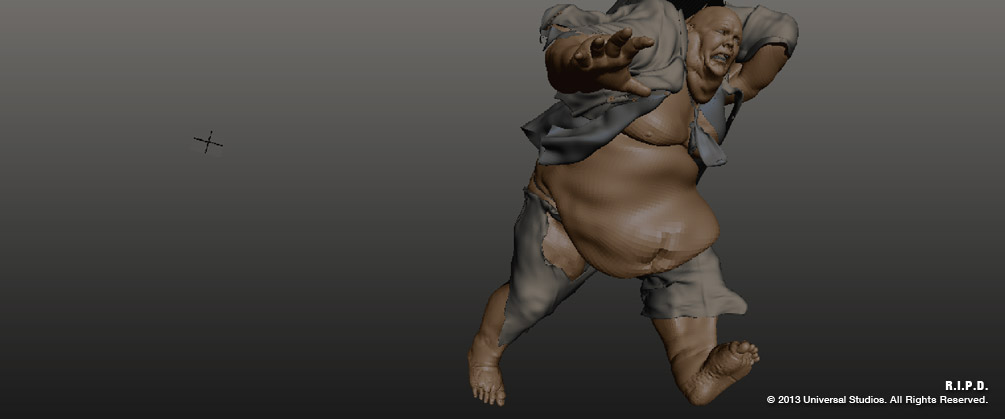
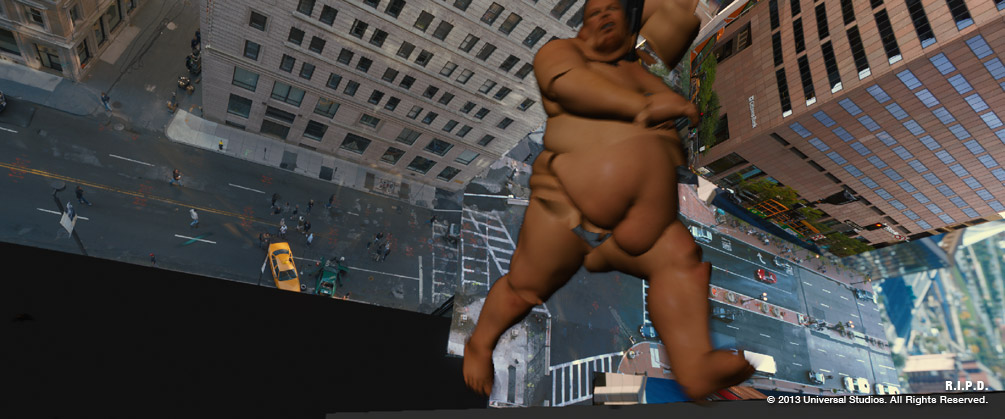
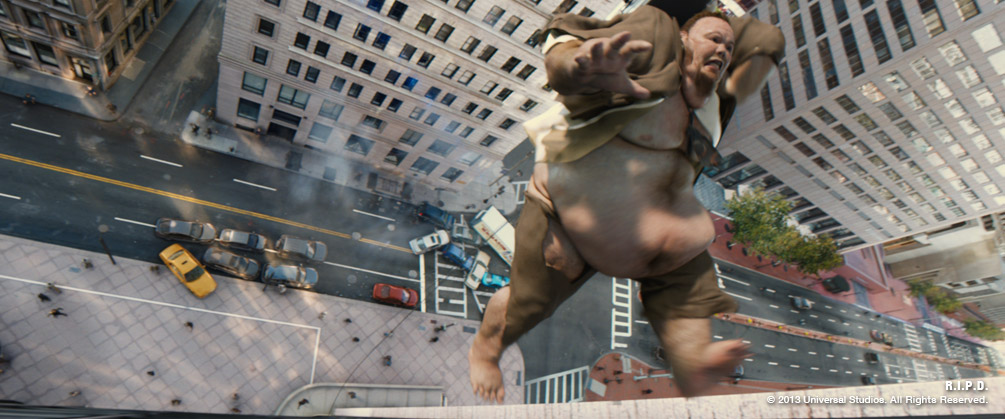
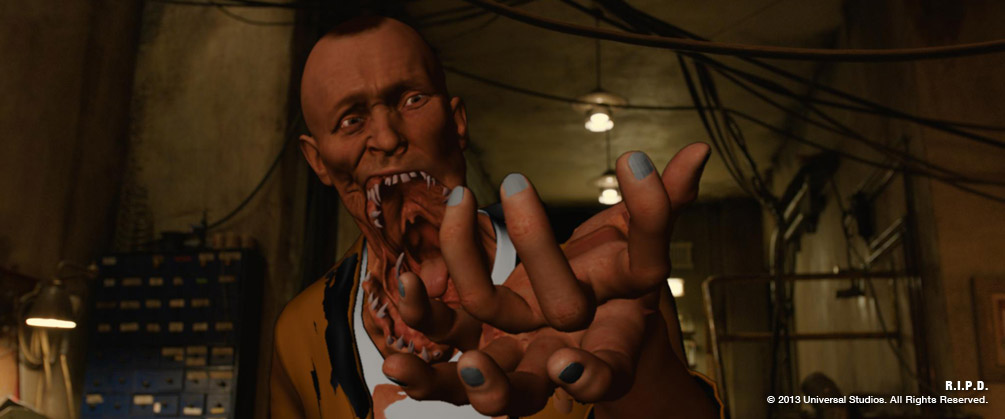
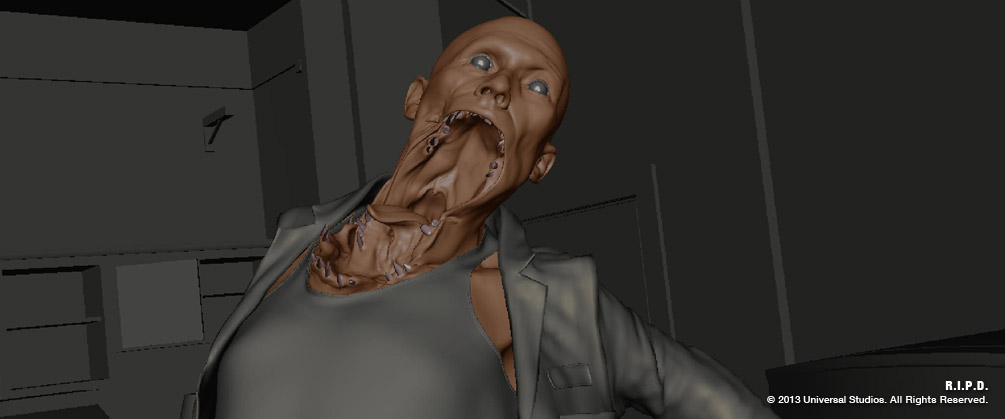
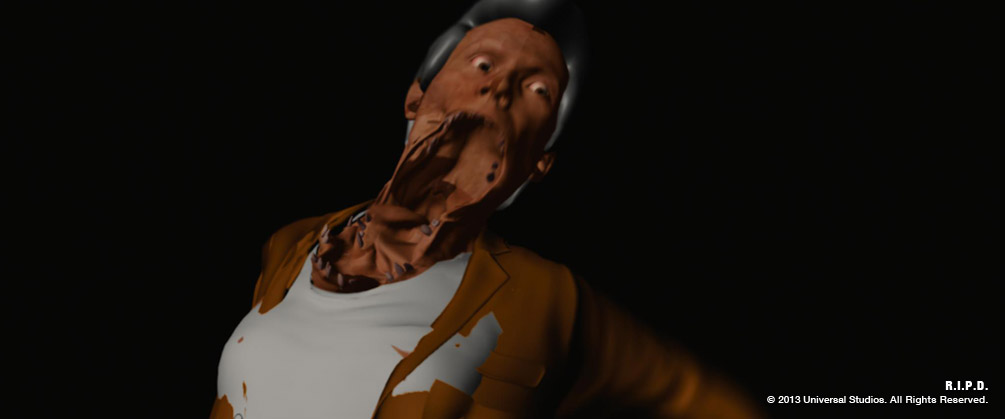
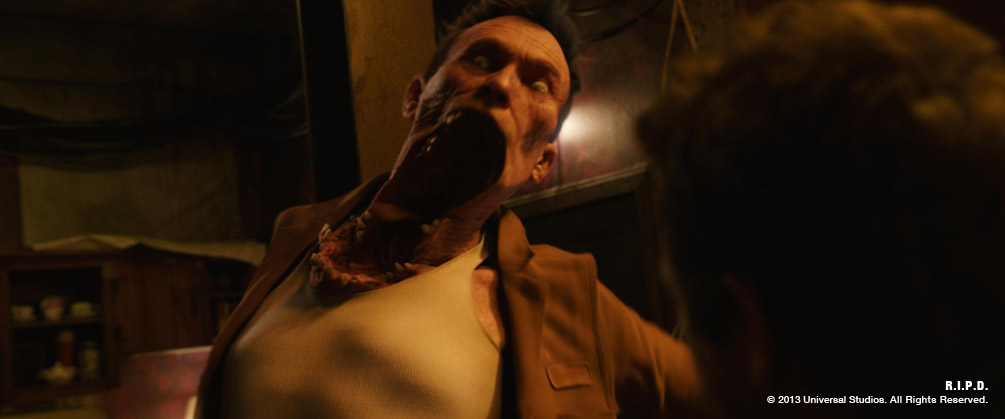
The deados of R.I.P.D. take on fantastical proportions when they transform or ‘pop’ from human to creature. Pulaski is notable for his giant physique, and Nawicki’s anatomical deformations include growing several feet, detaching a limb and suffering a disintegrated jaw, which was a tough design to realize.
“Nawicki’s jaw melts into his chest – so we did take some design liberties in terms of how much everything stretches and flaps around – we loosened up skin in some places and made it more elastic in others to make it easier for the animators to work with. That’s the kind of detail that helped take it from the picture into the 3D world and all the subtleties that we can add to that,” Kjölsrud added.
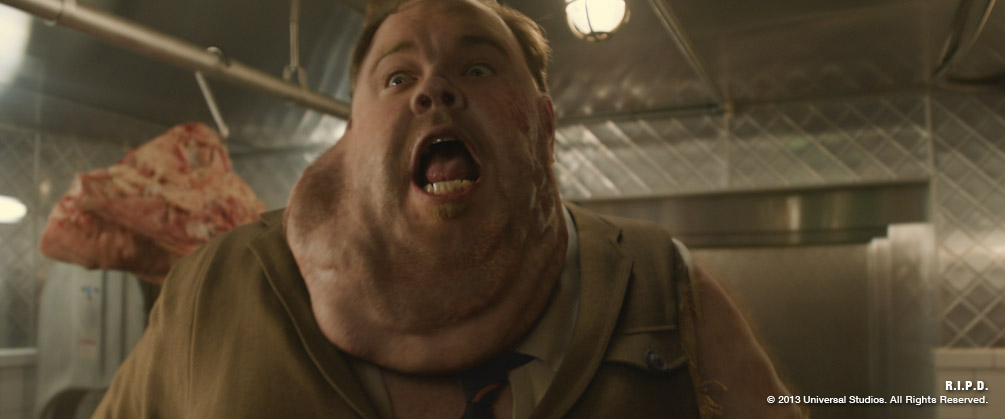

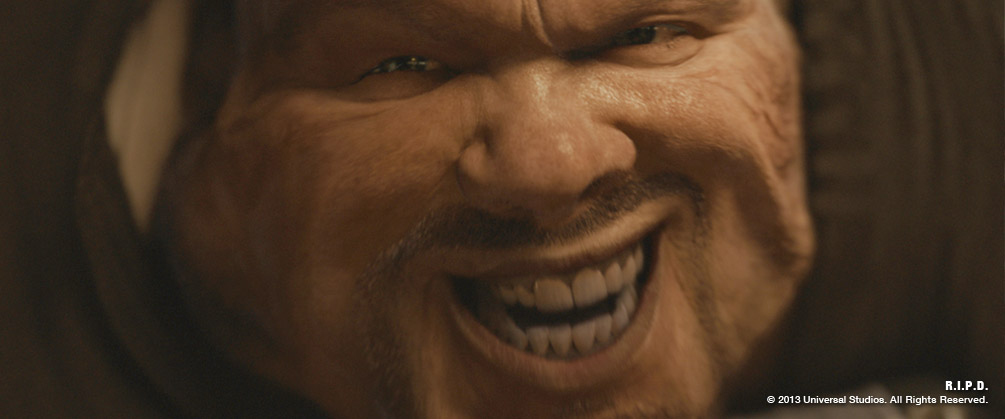
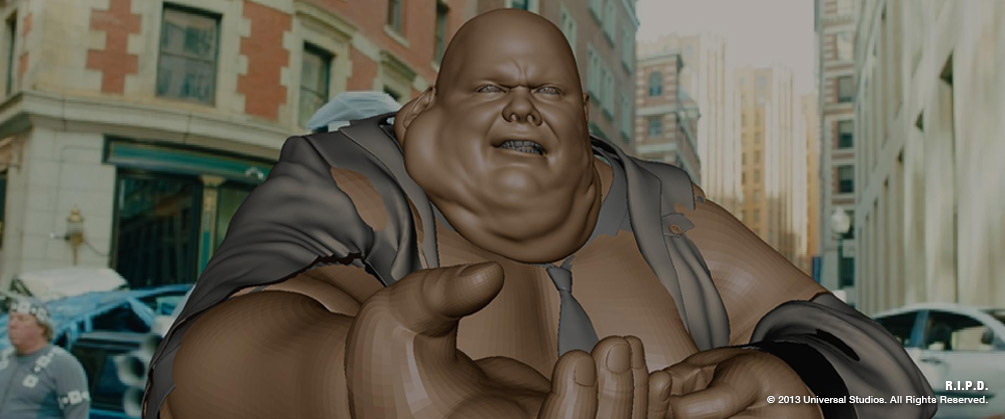
One of the main challenges for Pulaski was his speech and facial movement. “This was the first time that IE had to do close up photo-real faces of characters that are very expressive and also talking – right in front of the camera,” said Fred Chapman, Rigging and Creature FX Supervisor.
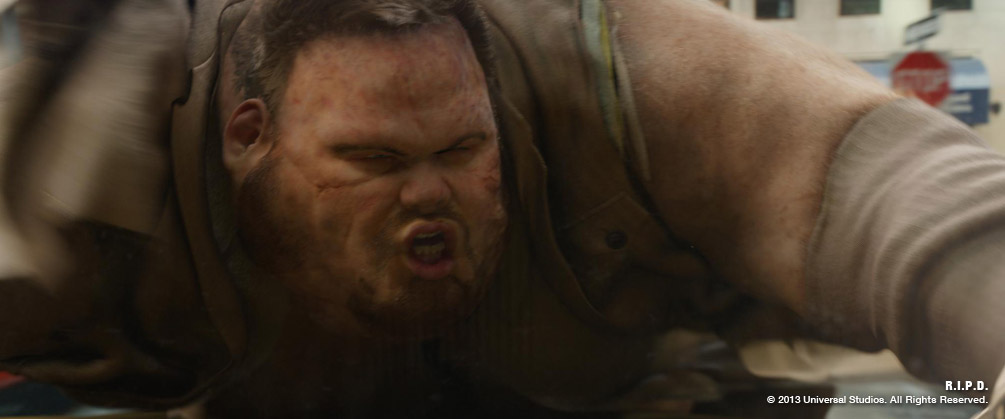
“Rather than using a conventional face rig, we developed a muscle-based system. In addition to hitting all the required facial expressions our system also achieved a more organic looking transition from one expression to the next,” elaborated Chapman. “Through our layered approach and optimized data management we were able to keep the complexity under the hood and give the animators simple, intuitive, fast controls. On top of this we layered dynamic flesh simulation to add even greater sense of realism.” The Rigging and Creature FX team worked closely with the animators to ensure that the system supported their creative process. “This muscle-based system made our lives easier to get that level of detail that made the shots look good,” noted Animation Lead for the Pulaski sequence, Jeremy Stewart. “Its probably the best face rig that I have ever worked with.”
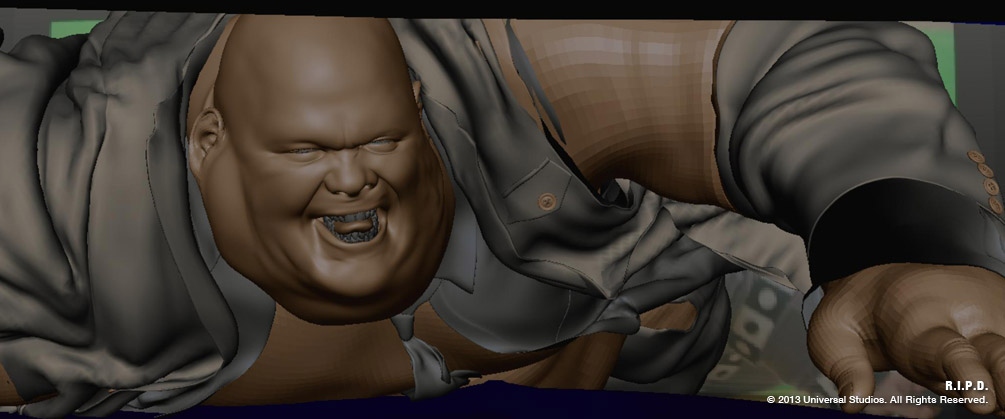
Pulaski had an immense volume, which placed further demands on the rigging team. “The vertex count was way beyond anything that we had to deal with before on a character,” explained Chapman. “We’d not only increased the detail in the work, but also the sheer size – we were dealing with a huge mesh. That created challenges in terms of the amount of data involved, so we found ways of managing that data and creating ways of working that allowed animators to be interactive, but get as much feedback as they could while they were working – so while they were animating they would be able to get the best sense of what the final result would be.“
The fat dynamics played a big part in bringing Pulaski to life, to which detailed animation could then be added, including comedic touches like jiggling the fat, and adding ripples in the wind. “For the fat dynamics we used a combination of proprietary tools like our own custom wrap deformer and our own muscle system together with NCloth simulations to create a fat simulation which we could turn on and off as we needed it,” Chapman noted. “When a cache was created by the animators the dynamics would automatically turn on, so the first pass of the dynamic body simulation was done on the farm straight from animation, enabling the artists to get an idea of what the final output of their work was going to look like without it having to pass through another department first.”
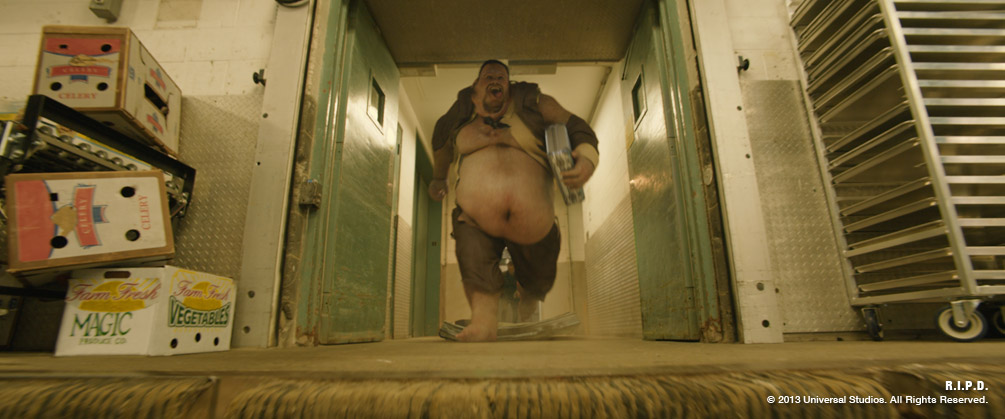
Pulaski’s bulk proved challenging for the animators, when it came to the chase sequences. “When we started animating Pulaski he looked really heavy and not very athletic,” recalled Stewart. “That was a problem in terms of the narrative – this guy was supposed to be able to outrun the R.I.P.D. officers, so he needed to be able to move and manoeuvre quickly. The Director asked us to look at some NFL football players – some of these guys are huge but they can move with a lot of speed and agility, so we tried to put a lot more of that into the character and his movements. It was a real challenge to keep him looking like he was heavy, but still quick and agile.”
For Nawicki’s transformation, which involved a number of anatomical deformations, staging the action was key. Timing the animation was all-important so that the audience was able to read each transformation as it happened without missing any detail.
Image Engine’s modular rigging system, Riglets, was used to create the basic character for Nawicki– which has stretchable limbs and the ability to grow already built into the basic biped character.
“The detachable limb and the jaw in particular was more of a one-off effect,” said Chapman. “Customizing approaches for these one-off shots kept the flow of the work a lot simpler. Half the shots had Nawicki with his arm off and half with his arm attached, so we built the character with the arm separated. The arm rig itself was a whole separate rig that we could bolt on to the shots where we needed it.”
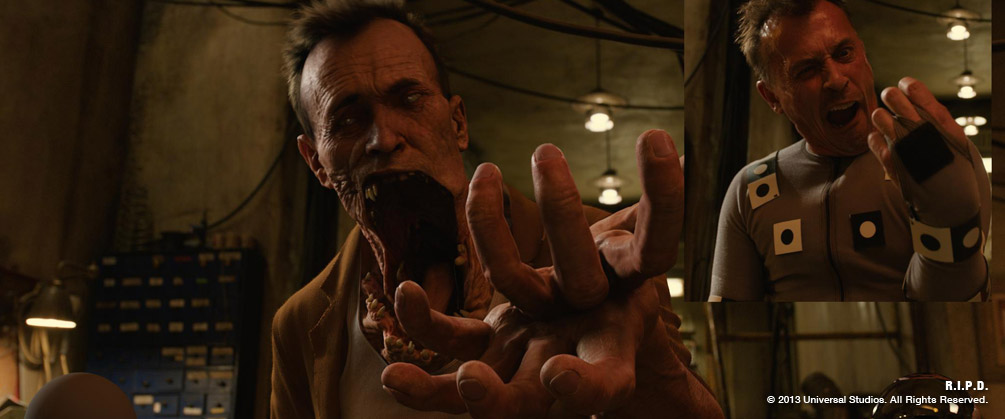
A rigorously anatomical approach was applied to the jaw transformation. “One thing that was important for us, was creating what I termed an anatomical narrative so that we had a sense of the underlying structure as it was transforming – which bits were bone, which bits were soft tissue etc.,” Chapman explained. “We tried to create a narrative about where there were muscles that were contracting and tendons moving, and how the underlying solid structures of bone and teeth were being pulled around. Even though it was very fantastical effect, this helped us to ground it in a sense of realism – to create something that looked like a real physical entity.”
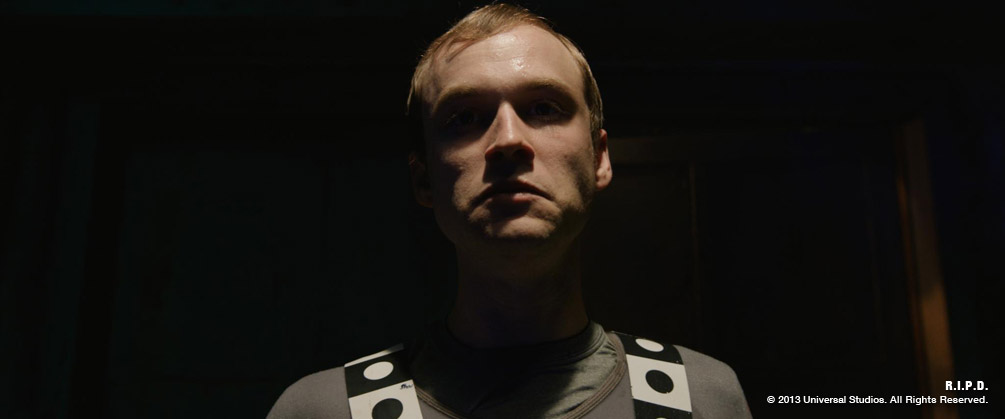
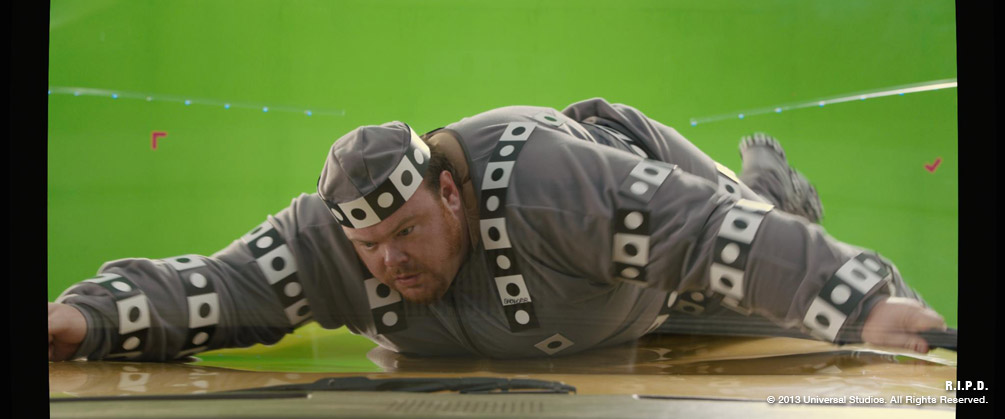
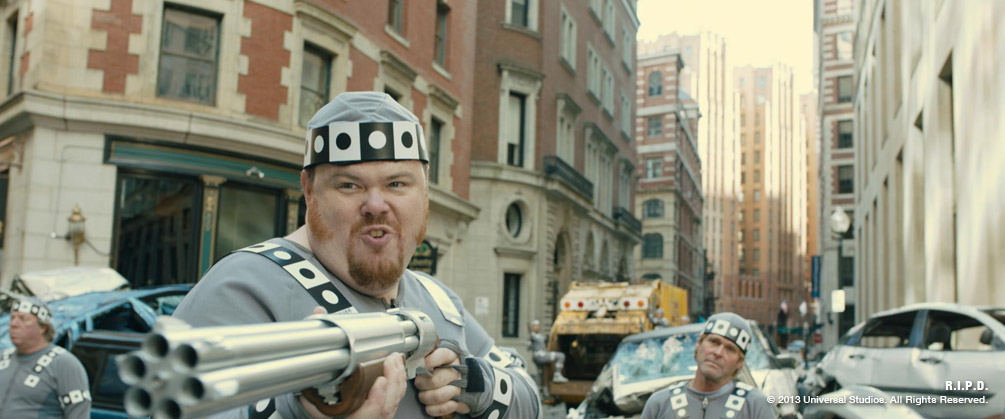
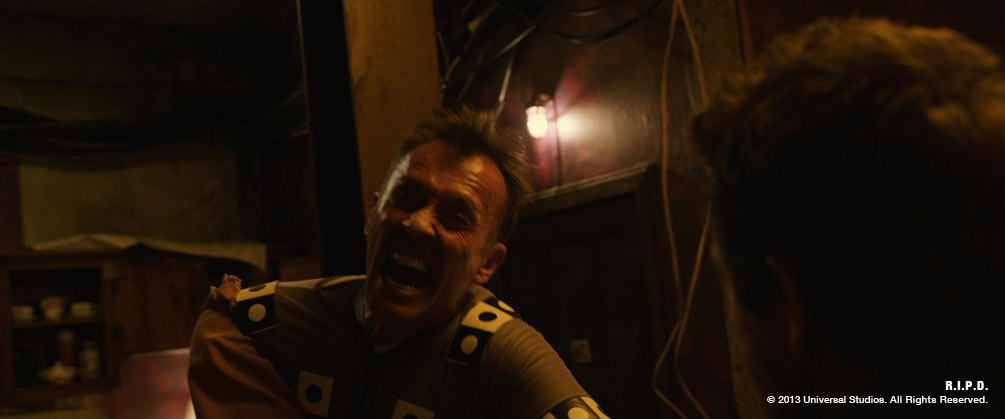
The actors for Nawicki and Pulaski were filmed in grey suits to be replaced by the CG creatures. “This was great because the Director was able to cut it together, and had all the beats that he wanted, so it was fantastic reference not just for lighting and how skin reacts to the environment – it was also a good guide for performance,” said Kjölsrud.
The animation had to be interpreted rather than matched, due in large part to the physical differences between the actors and their digital counterparts. “When they transform, they go from being under 200 lbs and 5’ 5 to being 7 feet tall and over 400 lbs,” described Stewart. “So we could only use the performance as reference but it was a great starting point. Some of the finer details were more closely copied, including Pulaski’s face when he talks, because we had to match to the sound.”

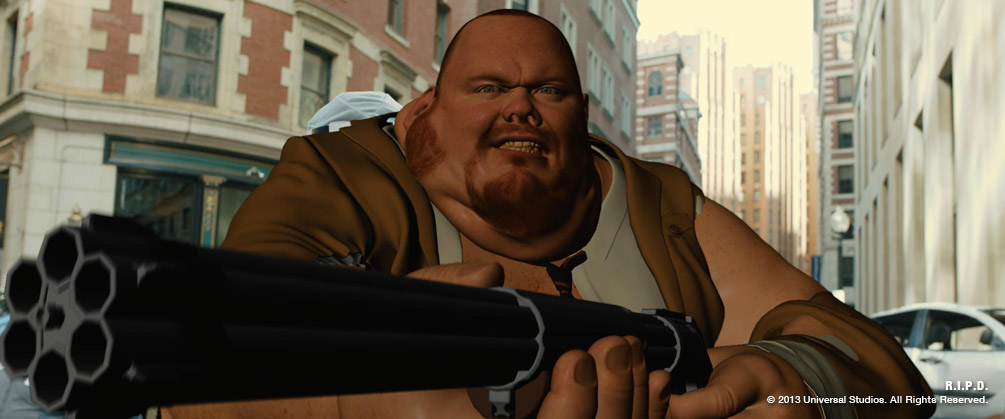
“For this show we had to do an overhaul of our skin shading approach,” noted Sequence Supervisor, Ben Toogood. “We had done quite a lot of work on previous jobs such as The Thing but we were going to do a lot more skin on this show, and get closer, with a lot more detail – so we had to make sure it held up to that scrutiny. One of the technical improvements was getting faster turnaround of the renders and getting the look we were after using less resources. In the past we had to bake very high resolution point cloud files to represent the scattering of the light through the skin, but using some of the developments in the 3Delight renderer, we were able to simplify that down and make the process a lot faster.”
R.I.P.D. featured more human hair than Image Engine had handled in the past, for the range of digital doubles and the hero characters. “There were the dual challenges of trying to simulate the longer hair along with grooming and getting the specific look to match the actors, and then rendering the hair,” explained Toogood. “The R&D team came up with a dual scattering approach to help model how the light would scatter through the long hair to give it that light and fluffy look – and that turned out well – we’re pretty pleased with the results.”
“Pulaski’s hairstyle was quite interesting, because it was quite short but it had a very specific quiff at the front which we had to mimic,” Toogood continued. “The creature FX team did a good job of the getting the right bounce – he was doing some extreme action so the quiff at the front would bounce up and down, and this helps tie the creature into the actors performance, and help to capture some of his personality.”
One specific challenge for Nawicki was his clothing. At the start of the sequence he had to grow in his clothing quite rapidly, so a way was found to simulate the cloth to stretch with his expanded volume and keep it flowing when he was moving and running around. “For this, cloth rigs were created, which functioned very similarly to animation rigs and could piggyback on to the animation pipeline and proprietary asset management tools that we already had in house,” explained Chapman. “There were a few extensions that we put into that, for instance, something we called cascade caching. Nawicki and Pulaski had multiple layers of clothing, and what cascade caching allowed us to do was to cache out – initially from animation, the first pass of body dynamics. Then each layer that was built up on top would automatically trigger the next layer. Once a layer of clothing had simmed we could generate the next layer automatically – so it didn’t need someone to manually go in and run each layer every time there was a little change as a separate manual process.”
Interacting with Environments
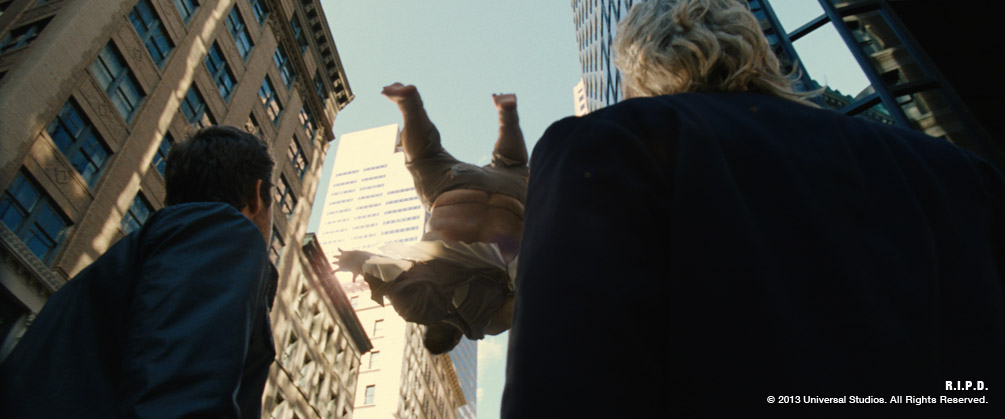
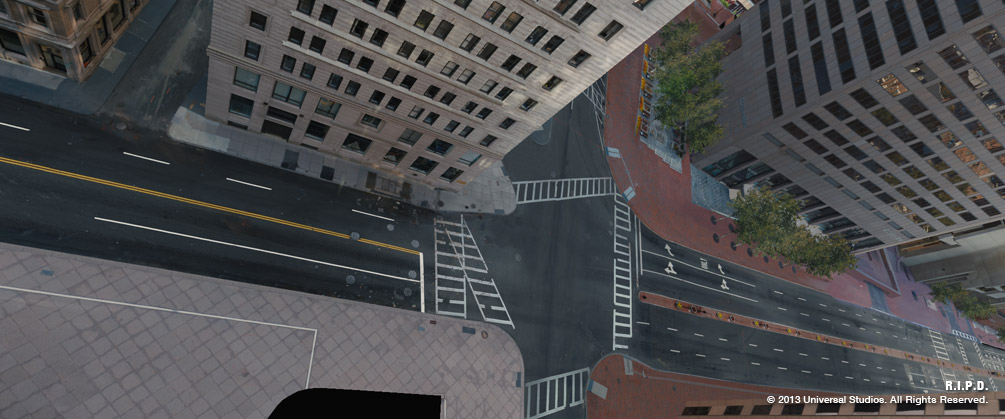
As soon as the creatures escaped onto the street, the scope of environment work grew, along with the creative possibilities. “There is a big part of the sequences where we couldn’t film much at all – the camera is flying up and down and around buildings, so we were pretty free to do whatever we wanted with a basic brief,” Kjölsrud recalled. “There were certain shots that we weren’t going to create in any other way than creating a 3D environment. We created environments for both major creature sequences.”
The environment build included a fully computer generated city of Boston, with the detail concentrated in the main centre. Data was captured on set by shooting a large number of tiles of the cityscapes. The individual images were stitched together to represent one large view of the city, which could then be projected back on to the geometry.
“We used an open source software called Hugin to stitch all those images – and our R&D Team also helped with this, to write our own tools to help with our projections,” noted Martyn Culpitt, Compositing Supervisor.
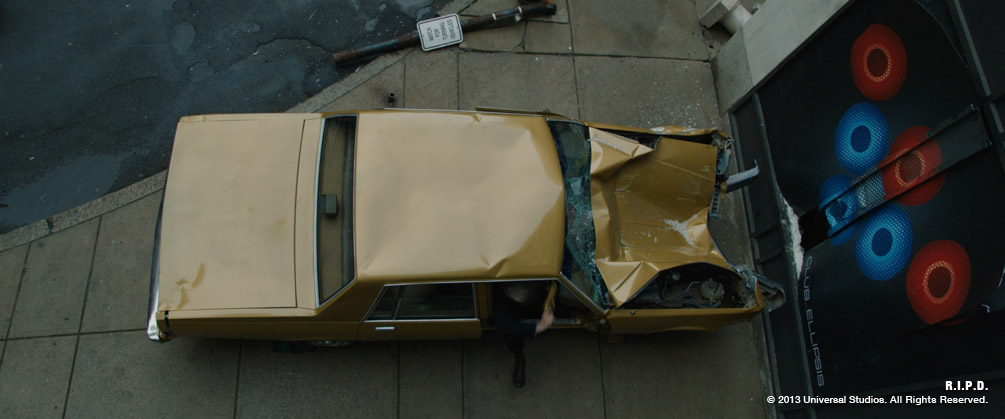
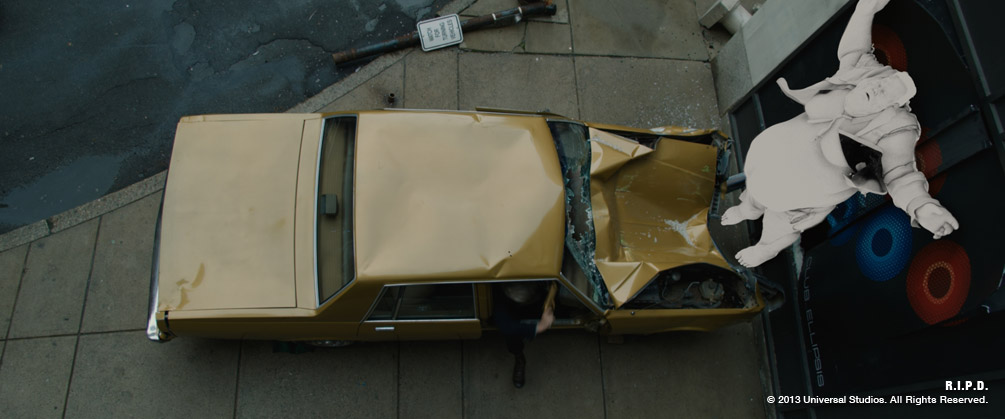
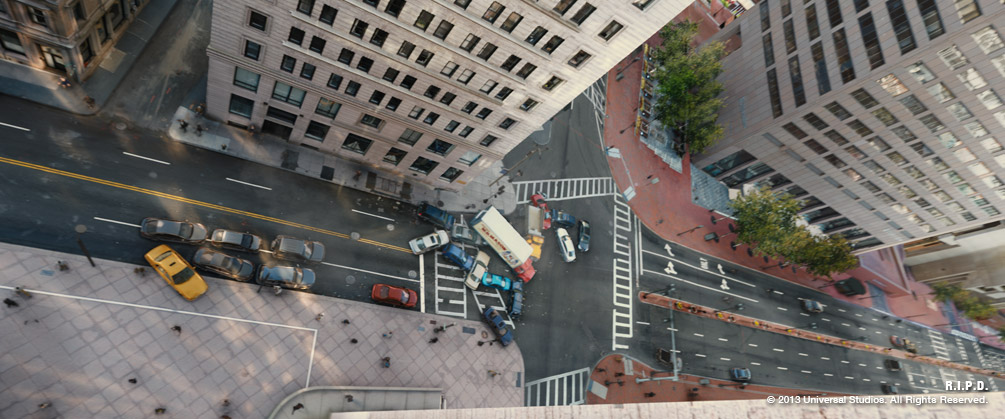
Pulaski provided the biggest challenges when it came to interacting with the environment, particularly FX and compositing. “Everywhere Pulaski went he went he broke something – there were doors being ripped off walls, there were glass windows being shattered, he falls on top of a car and the whole car has to fall underneath him,” Jacob Clark, FX Lead, described.

“We had to create a fully glass high-rise and have him running across that as well as reflecting our environment. FX was integrated for the glass as he smashes it on impact. It was very complex – we ended up having many hundreds of layers in NUKE to help do this,” added Culpitt. “We used Atomkraft to help create reflections on the window of our environment as well as creating a point cloud – our R&D team as well as Chris King helped to develop that shader – and it let us export all of our projections of that environment to Maya so they could use that as a reflection for the glass high rise.”

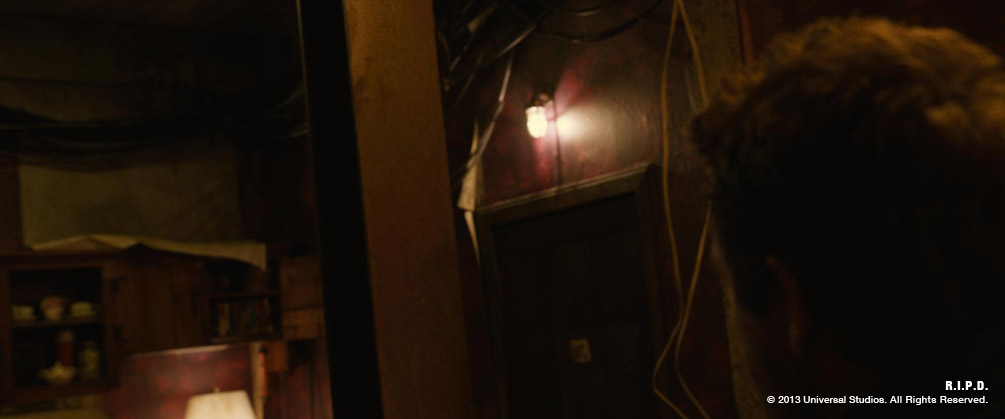
An interesting approach was taken to help the interaction of the characters with the indoor environments. For the Nawicki sequence, his transformation had devastating consequences for his surrounding apartment. The set was filmed in its pristine state before the effect, and then completely redressed and filmed in its destroyed state. “Our job was to bridge that gap,” said Kjölsrud. “Before they started re-dressing that set, we took a lot of high dynamic range images (HDRI) that represented the lighting and the shading of the room. We built a digital version of the pristine room, where we projected these back out onto the geometry that we’d built, matching the set quite precisely. That gave us a room that had all the illumination properties of the actual room on set – and we could use that to light the characters directly. Then we let FX and Comp go to town layering up and adding all of these effects to go from one to the other.”
Deado Death FX
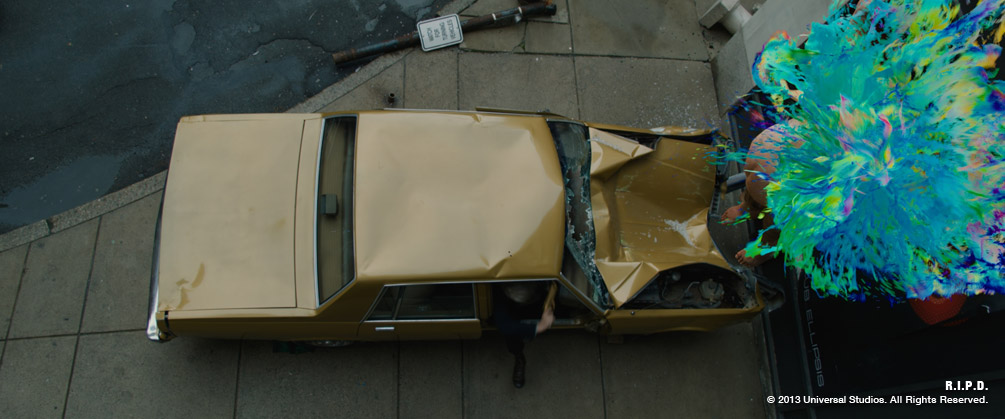
When the crew were briefed to come up with designs for the deado death FX, the main challenge was to create something spectacular, but not gory. “It was quite a creative process to get it there, a lot of back and forth with the Director and the Production Supervisor but it worked really well in the end,” said Kjölsrud.

“We started by animating the creature doing something quite violent. The key was to get a momentum behind it – so we started by shooting with a projectile so that they fly backwards. Then we ran fluid sims and particles in the air based on that motion and let that interact with the environment in terms of colliding and shading.”
The FX team was given some creative freedom to explore how this would look, and the final effect consisted of three main layers. “There was a volumetric death cloud, a fine particulate cloud of ink and an internal rift to suck away the entire effect into its non-existence,” described Clark. “We used the Houdini 12 Volumetric system to achieve this effect. We developed custom tool sets to take characters from animation and convert them to volumetric emitters based on additional FX keyframe animation. These emitters injected fuel into a fire simulation of sorts to pick the proper forces, and movement.”
By creating tornado forces, along with a field of negative divergence, the death cloud would pour out of the character and swirl around in the tornado as it was sucked into the internal rift. “Once the overall animation of the death cloud was set, the particulate element was advected through it’s velocity field,” said Clark. “By layering multiple simulations of particulate we were able to achieve hundreds of millions of points to represent the dark inkiness the director was looking for.”
Frozen World
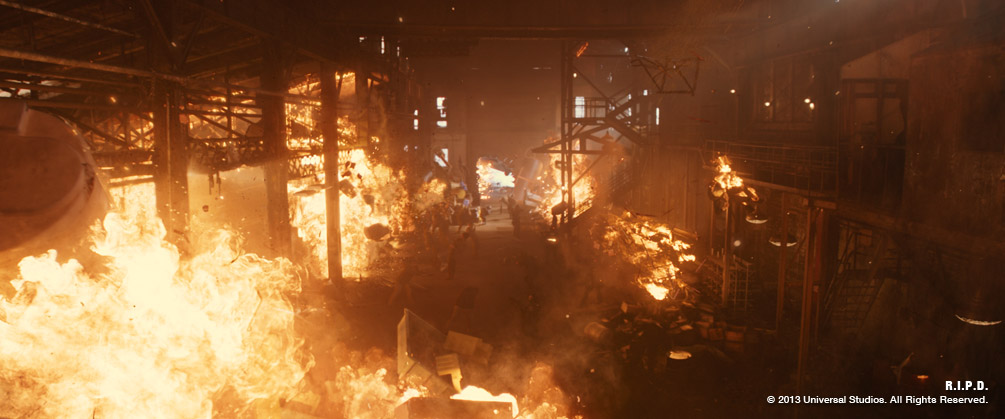
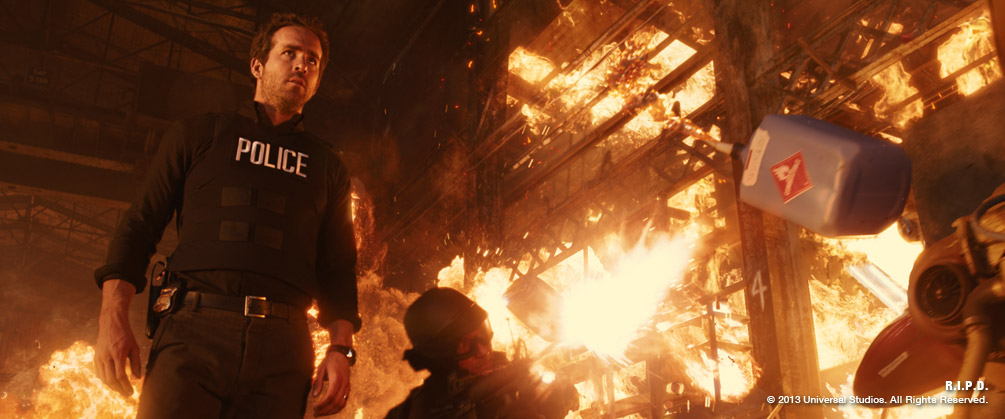
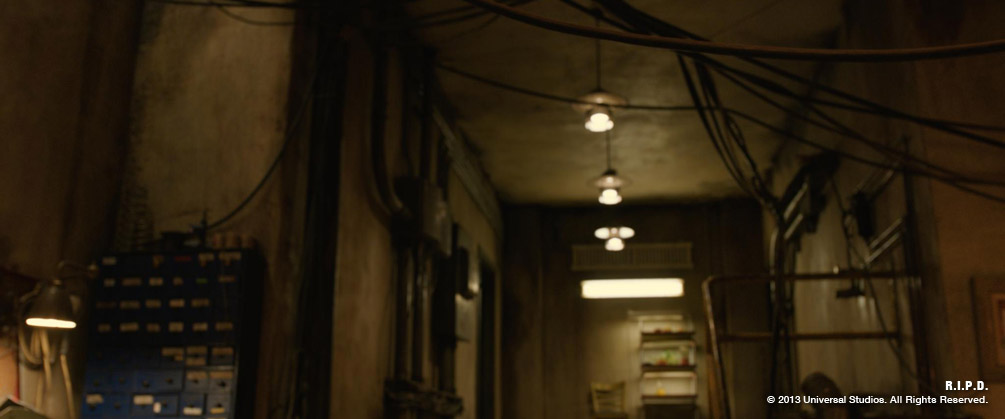
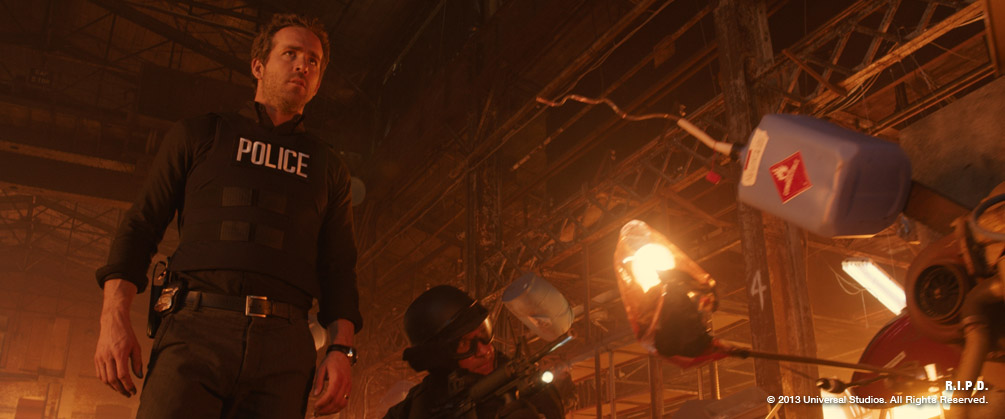
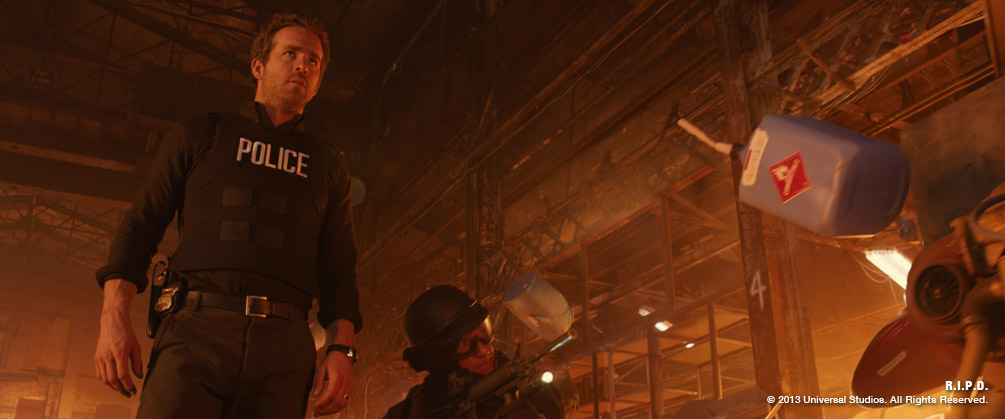
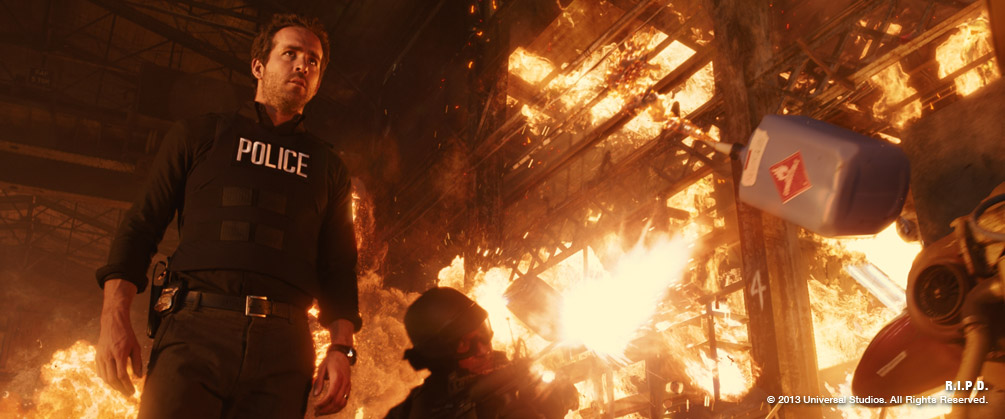
Image Engine’s work is first seen at the beginning of the film, when Reynolds’ character is slain in a gunfight, and his soul leaves his body, shortly to be recruited by the R.I.P.D. At this moment, the world freeze-frames, allowing the camera to move around and explore the blaze surrounding him in exquisite detail.
“The frozen world sequence was an interesting challenge,” noted Kjölsrud. “The way it was originally planned was to film the shots and then shoot explosions and fire with still cameras. I realized pretty quickly when we started to film it that we would have to cheat a lot of the shots to not see the back of another camera. So we made a conscious decision early on to start generating some of these explosions in 3D.”
Image Engine had previously worked with 3D fire on Battleship. “We had to build upon that work, and take it to the next level,” said Clark. “By freezing the fire mid-explosion, there was nothing to hide behind. No motion blur or fast movements to trick the eye. Everything had to stand still in its pristine state.”
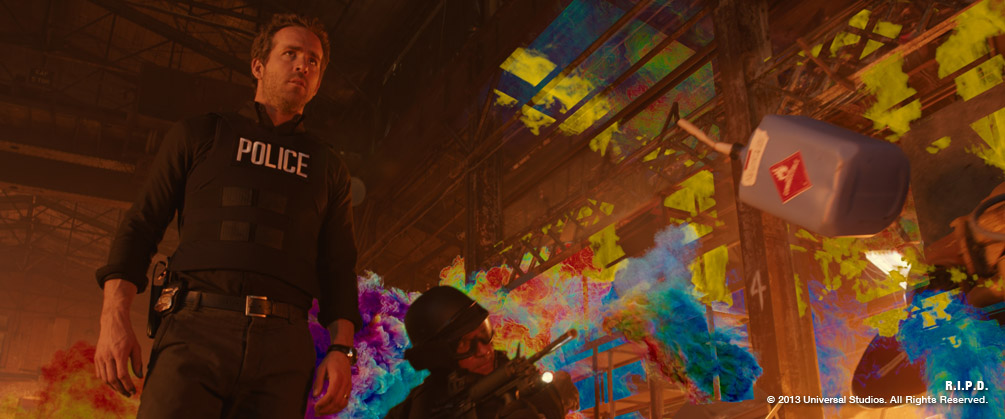
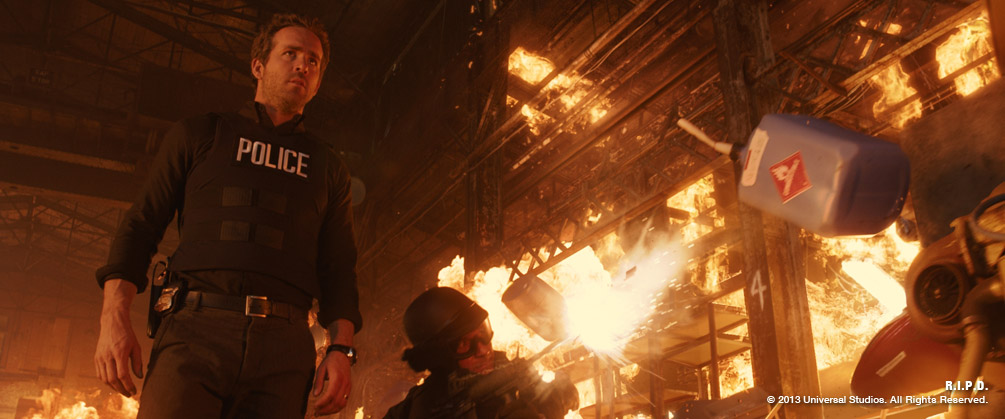
“We started the process by playing with the default Houdini fire system, re-writing the Pyro shader to create the look of dangerous flames which were really rooted in the scene,” Clark continued. “Through the use of many iterations we explored the relationship between the amounts of smoke and fire. The Director wanted everything to feel clean and not too covered in dark smoke. Striking the right balance between the smoke and fire allowed much more volume and size for the fireballs without adding more brightness to the shots.”
“We quickly discovered the key to generating realistic CG fire was to give the compositors as much control as possible. The fire was rendered into its separate fields in a variety of hues. Each of these passes was combined in NUKE by the compositing team. There, the final colour was added to the fire, as well as various glows and edge detailing to make the fire sit in the surrounding scene.
In addition to the fire and deado death sequences, destruction FX were used to digitally damage the various sets and props in the world of R.I.P.D. Key shots include an elevator car falling to the earth from hundreds of feet; a Ford Mustang flung down the street and rolling over one of the hero characters; and a house collapsing and splitting down the middle.
For R&D, the main challenge of R.I.P.D. was the complexity of the creatures and the environments. The team implemented new systems for facial rigging, fat and cloth simulation, skin and hair shading, and projection workflows, along with higher-level management tools to handle the complexity of data management for the shots.
“This show particularly tested our rigging, cloth and hair pipeline with their unique look and the performance that was required,” said Vera Zivny. “The end result was worth it – we had two fantastic creatures in multiple environments that we can be proud of.”
“I think we stepped up to a new level of complexity and quality,” concluded Kjölsrud. “The project was so varied, with multiple talking characters, environments and effects added on top – throughout all this, the crew did a great job of keeping the quality level consistently high.”